Monday, January 9, 2012

Martha Monday: Gingerbread Raspberry Linzertorte

If you have the Martha Stewart Pies and Tarts tome that was released this past spring, you may recognize this as the Gingerbread Raspberry Snowflake Tart featured on page 276.  What you will not recognize on my tart are any snowflakes, as 1" snowflake cookie cutters seem to be non-existent in the DC area. So you get a Gingerbread Raspberry Daisy Tart, I hope that's ok.

Ever since the arrival and immediate cracking open of my copy of this cookbook, the Gingerbread Raspberry Tart stood out to me as visually striking, and quickly became one of the recipes at the top of my to-do list.  This is an excellent winter or holiday tart, not only because of the snowflakes (er, snow daisies?) but also because of the interesting gingerbread twist on the classic holiday linzertort.

I have to admit however, although the tart is visually appealing, I and some of my coworkers thought the flavors in the gingerbread were off.  Personally, I found it much too salty and next time would maybe add nutmeg and increase the brown sugar.  If you're a big fan of molasses however, you may like the recipe just as it is.  Either way, the tart was still good, just not quite what I expected.


A couple of notes: When rolled out, the gingerbread dough cracks and breaks very easily, I recommend using a knife or bench scraper to loosen it from the countertop before transfering it to the tart pan or baking sheet.

For my tart I just used store-bought raspberry jam because I didn't feel like spending $20 on raspberries to make my own.  If they happen to be on sale in your neck of the woods, I've included Martha's jam recipe below and it's very easy.


Gingerbread Raspberry Snowflake Tart
  makes one 10-inch tart

2 1/4 cups all purpose flour, plus more for dusting
1 1/2 tsp baking powder
1 tsp ground ginger
1 tsp ground cinnamon
1/2 tsp ground cloves
1/2 tsp ground pepper
1/2 tsp salt
1/2 cup packed dark brown sugar
1/2 cup (1 stick) unsalted butter, room temperature
1/4 cup unsulfured molasses
2 egg yolks (1 egg white reserved for egg wash)
1 1/4 cups seeded raspberry jam (jarred, or recipe below)

1. Sift flour, baking powder, ginger, cinnamon, cloves, pepper, and salt into a bowl.  Add sugar; mix on medium-low speed until combined.  Add butter; mix until combined, about 2 minutes.  Add molasses and egg yolks; mix until dough just comes together, about 30 seconds.

2.  On a lightly floured surface, roll out two-thirds of dough to a 12-inch round, 1/4 inch thick.  Fit into a 10-inch tart pan with a removable bottom.  Spread jam over shell; refrigerate about 30 minutes.

3. Roll out remaining dough to a 10-inch round, 1/4 inch thick.  Transfer round to a parchment-lined baking sheet; refrigerate or freeze until firm, about 30 minutes.  From round, cut out dot shapes with metal pastry tips, and snowflake shapes with cookie cutters (if desired, reserve snowflake cutouts and sprinkle tops with sugar.  Bake 10 minutes at 350 degrees).  Refrigerate until firm, about 30 minutes.

4. Lightly beat egg white; brush rim of tart shell.  carefully slide dough round over shell; press edges to adhere.  Refrigerate or freeze until firm, about 30 minutes.

5. Preheat over to 375 degrees.  transfer tart to a rimmed baking sheet.  Bake until crust is golden brown and filling is bubbling, 50 minutes to 1 hour.  let cool completely on a wire rack.

Raspberry Jam
  Makes about 2 cups
18 ounces (4 cups) fresh raspberries
2 cups sugar

1. Stir together 3 cups raspberries and the sugar in a medium sauce pan (off heat).  Let stand 15 minutes, stirring occasionally, until berries begin to give off their juices.

2. Bring mixture to a boil over medium-high heat, stirring occasionally.  Skim off foam.  reduce heat; simmer, skimming foam occasionally, until slightly thickened, about 5 minutes.

3. Stir in remaining raspberries; simmer just until berries break up, about 1 1/2 minutes.  Let cool completely. Refrigerate until set, at least 4 hours, or up to 1 week.

Sunday, January 1, 2012

I Resolve or, Carpe Cupcake

Well, it's that time of year again. You know, the beginning. That time of year when the interwebs explode with retrospectives and resolutions--when we wake up to a new year full of dewy-eyed hopes of accomplishments yet to come. Or just a hang over. :)

The past couple of years I've shied away from posting my new year's baking resolutions because I knew I would be traveling for at least half of the year and didn't want to set myself up for failure, or be pressured to squeeze in baking projects simply because I'd resolved to.  But, in looking back over those years, I realized that I actually managed to accomplish many of my baking resolutions anyway (see: French macarons and conquering my fear of yeast).

So, while there's a good chance I could be on the road again for much of 2012, I'm not letting that hold me back from plunging into exciting new baking projects for 2012. So, without further ado, I resolve...


To Finally Use The Ice Cream Maker I Got For Christmas A Year Ago

Jeni's Smoked Tea and Plum Pudding ice cream
For Christmas this year I was thrilled to get the Jeni's Splendid Ice Creams cookbook which is chock full of the most amazing ice cream recipes you could imagine.  Now I have no excuse not to get down to business. I mean, with flavors like Brown Butter Almond Brittle ice cream and Grapefruit Hibiscus frozen yogurt, how could you not??

To Try My Hand At The Fauxnut Trend


That's right, fauxnuts. Faux Doughnuts, get it? :) Simply a baked version of the usually fried treat, these cakes are catching on everywhere as a healthier alternative to deep fried dough.  Though, depending on the ingredients you use, I'm betting that baked doughnuts aren't really much healthier.  I'm also dubious that baked doughnuts can live up to the real thing but I can't even tell you how excited I am to try out these baked Red Velvet Doughnuts...

To Make Bread From Scratch...Again


So, I made bread in 2011. Once. It was...mediocre.  Baking bread from scratch was one of my resolutions for last year because I am terrified of yeast. It's temperamental, it's complicated, it's time consuming...but I'm convinced that the sense of accomplishment at the end of it all is rewarding enough to give this one another shot. Baguettes, perhaps?

To Make Glorious Homemade Marshmallows

Display of marshmallows in Paris. photo by Initiales JB

 Ok, I know this isn't technically baking. The last time I was in Paris there was a shop at the end of the street where I was staying that had the most amazing multicolored display of huge marshmallow bars in antique glass apothecary urns and  I knew then that I just had to try my hand at making something similar.  That was in 2009. Here I am three years later, but better late than never right? 


So that's it for now.  Now that I have committed my resolutions to paper (to screen?) we'll see if I am more or less likely to accomplish any of them.  What are the big cooking or baking projects you hope to accomplish in the new year?

Friday, December 23, 2011

Apple Pie Rugelach

Although I have decidedly taken a vacation from holiday baking this year (sacrilege, I know) at least my mom is here to pick up the slack.  While elbow deep in Buckeye cookies, chocolate-dipped meringues, dark chocolate cherry fudge and gingerbread, she somehow found the time to write up the exploits of her first attempt at rugelach--Enjoy!


To help celebrate my first year of retirement I decided to attempt something that I had never before had the time to do...Holiday Baking!  I figured that Hilary must have gotten the baking gene from me, right? Wrong!  While I could handle the simple cut-outs from pre-made Pillsbury gingerbread cookie dough and Chocolate-Almond Meringues, Apple Pie Rugelach was more challenging for a beginning baker.

I confess that I had never even heard of rugelach until I saw the recipe in the December issue of Good Housekeeping and then saw some on display at Whole Foods.  After scanning the ingredients and making sure there was nothing that would be hard to find I decided to tackle this treat [note from Hilary: we scoured THREE stores looking for dried apples. Just saying].  After some trial and error (duh, cutting the dough incorrectly) and advice from Hilary the final batch looked pretty good and even the rejects were tasty.

Here are some pointers I would have liked to have seen included with the recipe:

1) Parchment paper is a MUST as the jelly oozes out of the sides. I even decreased the jelly by 1 tablespoon for the last 3 batches.  2) Immediately remove the rugelach from the jelly puddles or they will cool attached to your cookie.  3) I reduced the baking time to 23 minutes, this depends on how well-done you like your rugelach.


Bring on the next challenge!  But maybe not until next year.


Apple Pie Rugelach
     from Good Housekeeping, makes 64 cookies
Dough:
1 cup (2 sticks) butter, softened
1 package (8-ounce) cream cheese, softened 
2 cups all-purpose flour 
1/2 teaspoon salt

Filling:
4 ounces (1 1/2 cups) dried apples, finely chopped 
1/2 cup walnuts, finely chopped 
1/4 cup packed brown sugar 
3/4 cup apple jelly
Confectioners' sugar, for dusting

Cinnamon Sugar:
1 cup granulated sugar 
2 teaspoons ground cinnamon 

Trial and error.  Even the rejects were tasty.
1.  Prepare dough: In large bowl, with mixer on medium speed, beat butter and cream cheese until creamy, scraping bowl occasionally. Reduce speed to low; gradually beat in flour and salt just until blended, scraping bowl occasionally. Divide dough into 4 equal pieces; flatten each into a disk. Wrap each disk in plastic wrap and refrigerate at least 4 hours or overnight, until dough is firm enough to roll. 

2.  Meanwhile, prepare filling: In medium bowl, combine apples, walnuts, and brown sugar. 

3.  Prepare Spice Sugar: In small bowl, combine sugar and cinnamon.

4.  Preheat oven to 350 degrees F. Line 2 large cookie sheets with parchment paper.

5.  Sprinkle work surface with 2 tablespoons Spice Sugar. Place 1 disk dough on top of sugar; turn over to coat both sides. Roll dough into 10-inch round, turning round over a few times and sprinkling dough with 2 more tablespoons Spice Sugar to coat both sides.

6.  Spread top of round with 3 tablespoons jelly, then sprinkle with 1/2 cup filling, leaving 1/2-inch border around edge. With knife, cut dough into 16 equal wedges. Starting at wide end, roll up each wedge jelly-roll fashion. Place rugelach, 1 inch apart, on prepared cookie sheet, point side down.

7.  Bake rugelach 30 to 33 minutes or until dough is browned and cooked through. Immediately transfer to wire rack to cool.

8.  Repeat with remaining dough, Spice Sugar, jelly, and filling. Store cookies in airtight containers at room temperature up to 1 week or in freezer up to 3 months. Dust with confectioners' sugar to serve.

Thursday, December 8, 2011

Brown Sugar Cardamom Sweet Potato Pie

Whereas in my last post I went out on a limb to try Eggnog Scones, a treat that brought together a couple of the flavors that I usually dislike, this recipe incorporates two of the ingredients that I've gone completely nuts for in the past year: cardamom and sweet potatoes.  When I saw this recipe from Baking Bites last month I couldn't wait to try it--two of my favorite flavors combined in one dessert! It's like she knows me!--and, honestly, I can't believe I didn't think of it myself since I'm pretty much a cardamom fanatic at this point and add it to anything and everything possible.

I was actually completely unaware of cardamom until relatively recently when I ate at one of my now-favorite DC restaurants, Rasika.  The delicious gulab jamun I had for dessert there were unlike anything I'd tasted and I HAD to know what spice was at work in the dish. And the rest is cardamom-scented history :)

If you haven't worked with cardamom before, it's very aromatic and has a slight citrusy taste that you'll probably recognize if you've ever had chai.  It can be purchased as whole pods (often crushed and used for infusing flavor before being removed) as well as ground, which looks like a cross between cinnamon and nutmeg.  If you're a big cardamom fan like me, you might also want to check out this recipe for Cardamom Panna Cotta, which showcases the flavor beautifully.

Even though Thanksgiving has come and gone, this would also be a great alternative for next year's pumpkin pie if you're not a pumpkin fan, or just looking for something different--although sweet potatoes have more calories from sugar than pumpkin, they are significantly higher in fiber, vitamins A and C, as well as calcium and iron.  So go ahead and have a second slice ; )


*A Few Notes: I've included the Martha Stewart graham cracker crust recipe I used but, if you don't feel like making the crust from scratch you honestly don't lose anything to taste in the recipe by buying a pre-made crust.  If you do make the crust, you should be more adventurous than I was and try it using cinnamon or gingerbread graham crackers (but in that case you might want to omit the added 3 Tbs sugar).  You can also cut sugar by skipping the caramelized brown sugar layer added to the crust before pouring in the filling.

Brown Sugar Cardamom Sweet Potato Pie
     from Baking Bites
1 9 or 10-inch graham cracker pie crust, prebaked or store bought
1 cup brown sugar, divided
1 1/4 cup cooked, pureed sweet potato or canned
3 large eggs
3/4 cup milk
1/2 tsp ground cardamom
1/4 tsp salt
1 tsp vanilla extract
2 tbsp all purpose flour

1. Preheat oven to 350F.

2. Place graham cracker crust onto a baking sheet. Sprinkle 1/4 cup brown sugar evenly over the bottom of the crust. Bake sugar-lined crust for 10 minutes while you prepare the filling.

3. Press sweet potato puree through a wire strainer to make it as smooth as possible, adding a tablespoon or two of water if you are working with leftover potatoes to make them a bit more pliable.

4. In a large bowl (or the bowl of a food processor), whisk together all ingredients except the flour. Whisk until very smooth. Sift flour over the sweet potato mixture, and whisk until fully incorporated.

5. Slide brown sugar-filled crust out of the oven and pour filling into pie crust (do not overfill crust if your pie is slightly shallow, just discard excess filling), then return pie to oven.

6. Bake for 40-45 minutes, until pie is set and jiggles only slightly when the pan is bumped.

7. Cool on a wire rack to room temperature. Refrigerate for at least 2 hours, or overnight, before serving.

Graham Cracker Crust
     makes 1 9-inch crust
12 graham crackers finely ground
6 Tbs unsalted butter, melted
3 Tbs sugar

1. Preheat oven to 350 degrees.  Pulse graham cracker crumbs, butter and sugar in a food processor until combined.

2.  Firmly press crumb mixture into bottom and up sides of a 9-inch pie dish.  Bake until edges are golden, 12-14 minutes.  Cool on a wire rack.

Wednesday, November 30, 2011

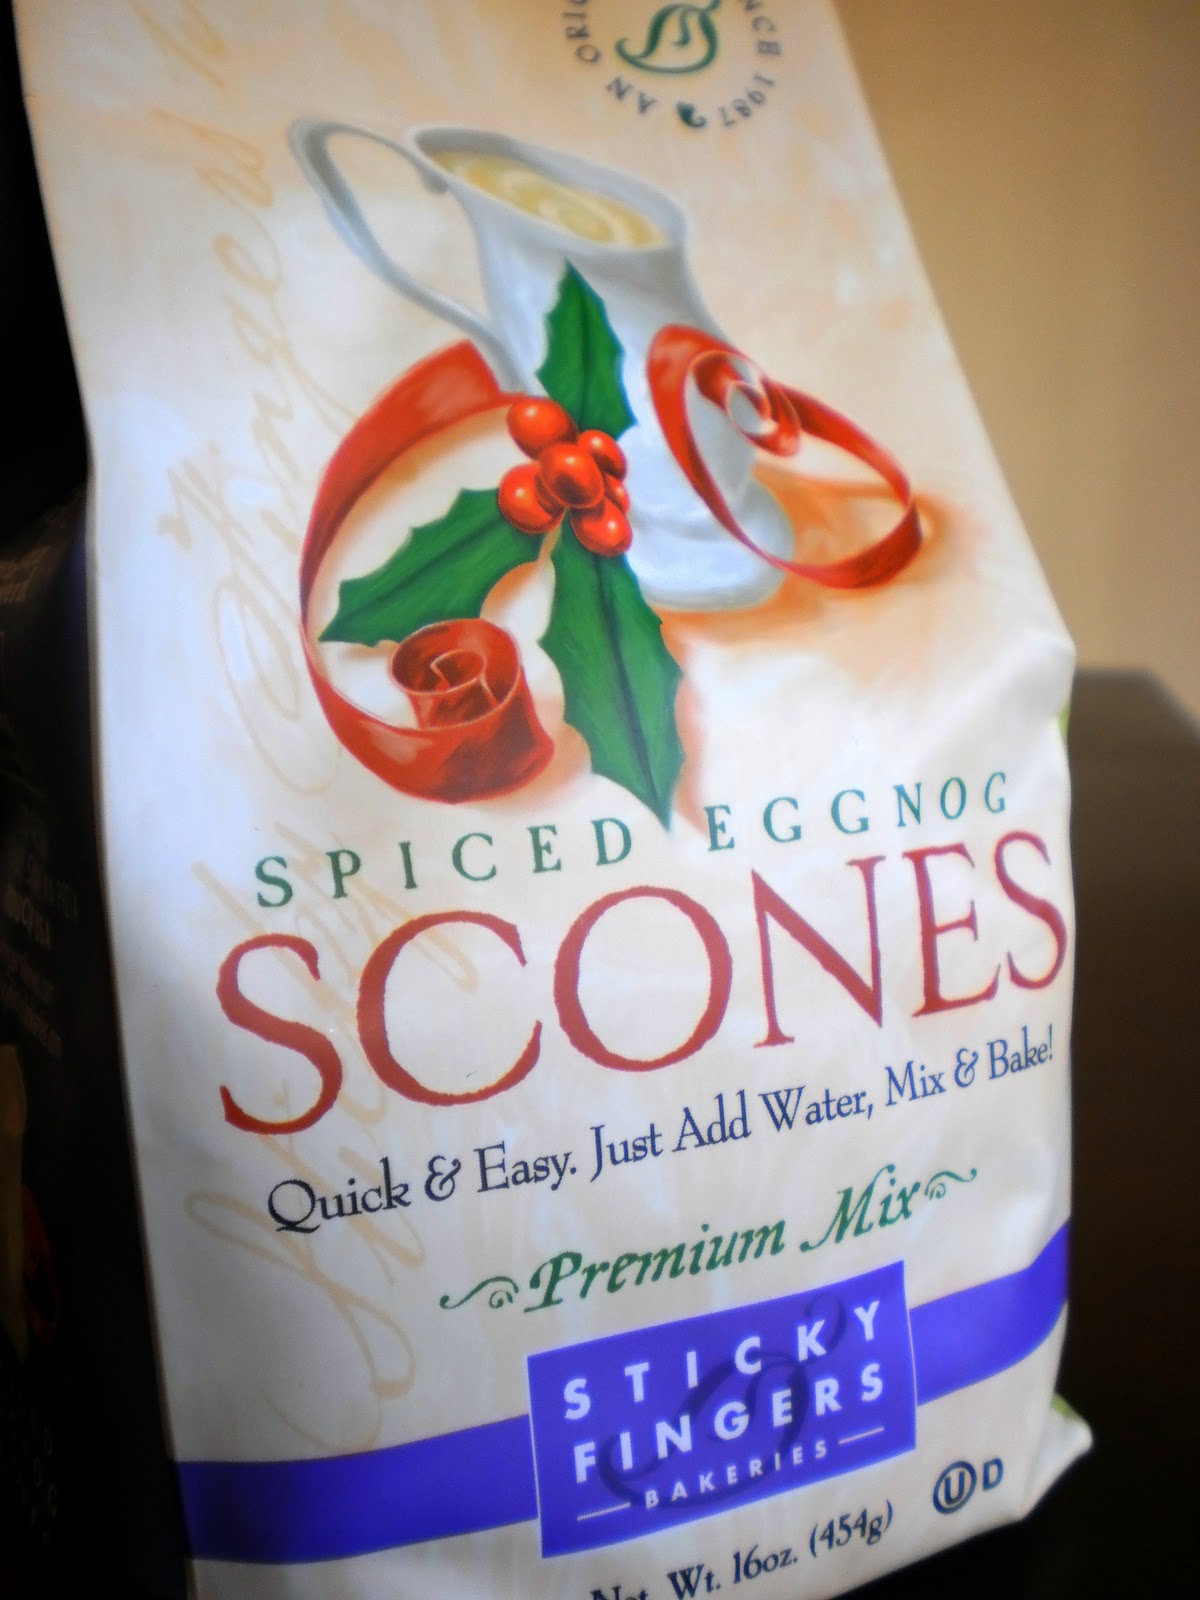
Review: Spiced Eggnog Scones

I have a love-hate relationship with scones. Mostly in that I want to love them, but I always hate them.  I think the problem is texture.  Because you can spice up a scone with any manner of chocolate-chunk-dried-fruit-frosting-drizzled goodness, but if it's still rock hard then I'm not interested. Is it mandatory for scones to be rock hard or something?

Enter Sticky Fingers Bakeries scone mixes.

After traveling for several months, I have to admit that it's taking me awhile to get back into the swing of baking again.  So far I've made gingersnaps from a Betty Crocker mix and made a brave attempt at red velvet cakepops, but we all saw how those came out.  While perusing the aisles of World Market, one of my favorite stores, I came across a display of scone mixes from Sticky Fingers Bakeries and thought they might be another good chance to ease back into baking, and also to see what a decent scone might taste like if all the mixing and measuring were already done for me.  Sticky Fingers offers a ridiculously wide variety of mixes from the standard blueberry and lemon, to raspberry and apple cinnamon, as well as seasonal flavors like pumpkin spice and peppermint chocolate chip.


This experiment was a double whammy for me because, not only do I have an adversarial relationship with scones...but I also hate eggnog. I want to enjoy it so badly--I love cream! I love nutmeg!--but I just can't do it.  I usually make up for this by pouting in front of store windows whenever I see signs for eggnog lattes or ice cream.  So I bought the eggnog scone mix, obviously. : )


And, believe it or not, I thought they were awesome.  Probably because they tasted more like "spiced" and not so much like "eggnog".  But the texture! Soft, chewy, fluffy! Amazing.  They still baked up a nice crunchy shell that you'd expect in a scone but were also soft enough inside to be enjoyable without being cake-like. Love them.  Just don't expect to see me dipping one into a mug of eggnog anytime soon. *pout*

Saturday, November 19, 2011

Red Velvet Cakepop Fail

Obviously I'm a little bit behind the times.  First it took me 12 months to make it to PAUL Bakery's new Penn Quarter location, and now, finally, at long last, I'm getting around to making...cakepops.  Just as the name implies, cakepops are hybrid cupcake-lollipops combining the perfect bite of candy coated cake perched adorably on a lollipop stick. Genius. What started as a humble treat from baking bloggess extraordinaire Bakerella exploded into trendiness, becoming arguably "the next cupcake" and is now a ubiquitous treat on dessert spreads everywhere. 

I think I kept from taking the cakepop plunge because they seemed deceivingly simple and I never seemed to have the supplies on hand.  And, it's true, cakepops do require a bit of a start up cost, but a trip to your local craft store will keep you in cakepop supplies for months.  In addition to the cake supplies themselves, you'll also need lollipop sticks, candy coating chips and a piece of styrofoam to place the pops in while they dry (I also bought pre-cut foil candy wrappers to make the cakepops easier for gifting).

I'll just tell you this up front: I was right about the "deceivingly simple" part.
These were two of the best looking ones. Seriously.
My personal favorite: the Runny Nose Cakepop
Don't get me wrong, these cakepops tasted AMAZING. They just looked a little...special.  The concept is simple in theory: Bake a cake from a boxed mix, crumble it into a bowl, mix it together with a can of purchased frosting, roll into balls, insert sticks and freeze, dip in melted candy coating, and voilá...ridiculously adorable Bakerella-worthy cakepops.  In reality, not so much.

Meatballs, anyone?
First I would stress that when she says to crumble the cake into a bowl, REALLY crumble it.  I even cut off the tougher edges from my cake first and my cake balls were still lumpy.  Secondly, she says to use only 3/4 of the can of frosting but I would use all of it--again to help with the lumpiness.  Thirdly, after inserting the lollipop sticks, be sure to freeze them for long enough--several of mine broke off of the sticks and fell apart in the candy coating.  Finally, you need to have WAY more patience than I did to get the candy coating to dry evenly--a second coat may have helped with the overall look but would have made the flavor much too sweet.

Crumble like you've never crumbled before

These wusses couldn't hack it
Overall, I think the taste and novelty factor (plus 100 leftover lollipop sticks...) are enough to inspire me to try these again, but let's just say I won't be mastering masterpieces like these anytime soon:
Bakerella cakepops for the new Muppets movie

Basic Cakepop Recipe
     makes 45-50
1 box cake mix (cook as directed on box for 13 X 9 cake)
1 can frosting (16 oz.)
Wax paper
Candy Melts (1lb)
Lollipop sticks
  1. After cake is cooked and cooled completely, crumble into large bowl.
  2. Mix thoroughly with 1 can frosting. (I use the back of a large spoon, but it may be easier to use fingers to mix together. But, be warned, it will get messy. Also, you may not need the entire can of frosting, so start out by using almost the entire can and add more if you need to.)
  3. Roll mixture into quarter size balls and place on wax paper covered cookie sheet. (Should make 45-50)
  4. Melt chocolate in the microwave per directions on package. (30 sec intervals, stirring in between.)
  5. Dip the tip of your lollipop stick in a little of the melted candy coating and insert into the cake balls. (Insert a little less than halfway.)
  6. Place them in the freezer for a little while to firm up.
  7. Once firm, carefully insert the cake ball into the candy coating by holding the lollipop stick and rotating until covered. Once covered remove and softly tap and rotate until the excess chocolate falls off. Don’t tap too hard or the cake ball will fall off, too.
  8. Place in a styrofoam block to dry.

Friday, November 11, 2011

PAUL Bakery USA

I'm somewhat ashamed to admit that an embarrassingly large portion of my time is devoted to seeking out bakeries and pastry shops in the States rivaling those I enjoyed every day when I lived in Paris.  Ok, just kidding, I'm not actually ashamed at all :) When you live in a city where it's practically impossible to walk down the street without tripping over gateaux and baguettes, let alone making it to your Métro stop and having any memory of how that Berthillon ice cream cone ended up in your hand...You tend to take for granted that impeccable desserts and baked goods are everywhere to be had.

So, you can imagine my excitement when I heard that a Paul location was opening up right here in Washington, DC.  Not a bakery in the French style, but an actual, honest-to-goodness French chain with over 120 years of history.  Unfortunately, as is the story of my life, Paul opened while I was traveling overseas, so I would have to wait several more patisserie-free months before indulging in tartes and macarons.  Luckily, I finally got a chance to sample Paul's offerings this summer during one of the free Navy band concerts offered at the Navy Memorial.  Paul's location adjacent to the memorial makes it a perfect stop for a pre or post-concert snack, and I took advantage of their concert picnic special--a baguette sandwich, pastry and drink for $11.95.  Unfortunately, you'll have to wait until next summer for this awesome deal--C'est la vie.

That's right. Macarons as big as your hand. *drool*

As soon as I stepped through the glass doors of Paul's, I knew I wouldn't be disappointed.  Brass bistro finishings, cafe tables and simple, classically French presentation brought back memories as I ordered my usual sandwich--jambon camembert, obviously.  And--what you really want to hear about--the pastries didn't disappoint either.  Enormous macarons, individual tartes, and crisp, flaky Napoleons abound.  Other than the excellent baguette for my sandwich, I didn't get to sample any other breads, but you can be sure I will be back for a boule or two.

Perfect vanilla napoleon (aka mille-feuille)

If you're looking for a taste of Parisian baking in DC, it doesn't get any better than Paul's.  And even though I was a little late to the Paul party, you're just in time to catch the opening of their newest location in Georgetown--after a soft opening this week, Paul Georgetown should be slinging sweets in no time.

If you go
PAUL Penn Quarter
801 Pennsylvania Ave, NW
Washington, DC
Metro Blue/Yellow: Archives-Navy Memorial

PAUL Georgetown
1078 Wisconsin Ave, NW
Washington, DC