Wednesday, April 27, 2011

Oh, Gurrrl--Cupcake Vodka

And here you were, getting all excited about the approach of summer so you could while it away on trendy patios everywhere, seeing and being seen, with a glass of Firefly Iced Tea Vodka swirling in your glass...Well, I'm here to tell you that those other flavored vodkas are SO 2010--because cupcake vodka has arrived.

That's right--the moment you didn't even know you were waiting for is here.  Somewhere at the corner of Gluttony Street and Sloshed Avenue is the intersection of guilty pleasures, captured in one bottle.      

From the same people that bring you Cupcake Vineyards--wines that, while delicious and the fastest-growing brand in 2010, don't taste like cupcakes--Cupcake Vodka is now hitting the streets in full-flavored cupcake fashion with Chiffon, Frosting, Devil's Food and Original flavors.  A grain and grape, six-times-distilled, 70-80 proof vodka with the "velvet silkiness, distinctive texture and a smooth finish" that you look for in vodka (and cupcakes...) cupcake vodka fills a niche in the flavored vodka market without using any artificial ingredients or sweeteners.

So what do you think? Is this a great idea, or just one more sign that cupcakes have jumped the shark?  Is this the chance manly men everywhere have been waiting for to indulge in their cupcake cravings without the fear of being seen with frou-frou frosting? Merely the latest incarnation of a cupcake trend that will one day consume the globe? :)  For me, the verdict is still out, but with cocktail creations like these, I know they won't keep me away for long...

Apple Crumb Cupcake
1.5 oz Cupcake Vodka Original
1.5 oz Apple Cider
One Very Small Piece of Fresh Skinned Ginger
1.5 oz Ginger Ale Lime Wedge & Green Apple Slice
Preparation
Muddle the ginger and Cupcake Original vodka in a mixing glass. Add the cider and shake with ice; strain over ice into a rocks glass and top with ginger ale. Garnish with a squeeze from the lime wedge and a green apple slice.

Friday, April 22, 2011

Cherry-Almond Crème Brûlée

After the rousing success of last month's inaugural Mardi Gras-themed supper club, it was recently my turn to host our rotating dinner just in time to coincide with DC's annual Cherry Blossom Festival, and we welcomed April with a cherry and Japanese-themed dinner inspired by DC's ubiquitous spring flower.

In addition to providing the main course of prosciutto-wrapped pork loin with cherry glaze, I obviously couldn't help but jump in with some cherry blossom-inspired desserts as well.  I decided on cherry-almond crème brûlée and--inspired by the cherry blossom festival menu at my fave DC restaurant Adour--cherry macarons.  Big mistake.

Because macarons are the cookie with possibly the most finicky reputation on the planet, I don't know what made me think I could crank some out like it was no big thing. "Oh, cherry macarons? The cookie to which you could devote an entire career of culinary study? No prob!" Suffice it to say that my macarons played along until the moment of no return, when they decided, at the last minute, to come out flat and crinkly.  While any number of things could have gone wrong (under beating the eggs, over beating the batter) I'm convinced that it's the cruel sting of baking karma.  As you may remember, Parisian Spring and I recently attempted our first batch of macarons and they came out PERFECTLY.  Like, omg-these-look-just-like-a-picture perfect.  So, because the baking gods blessed me the first time around, I know they're somewhere laughing with schadenfreude at my total macaron fail.

 
Macaron batter pretending to cooperate   


But on to the crème brûlée.

Fortunately, the crème brûlée came out excellently despite a little recipe mishmash and I was really pleased with the natural cherry flavor that comes from the addition of the cherry juice.  I think you could choose to leave the whole cherries in or out for this dish, depending on your preference.  Alternately I thought about puréeing the cherries first, so let me know if you try out that technique and how you like it.  Obviously the best part of crème brûlée is frightening your friends by wielding a kitchen torch after a few glasses of wine but, if you don't have one, you can always just pop your ramekins under the broiler of a few seconds to achieve the perfect sugar crust.

In honor of the Japanese gift of cherry blossoms, there was much hibachi to be had

I think Sandra Lee would be proud of my tablescape
Cherry-Almond Crème Brûlée
1 can sweet dark cherries, drained with syrup reserved
2 cups heavy cream
1/2 cup granulated sugar
2 teaspoons almond extract
5 large egg yolks
4 tablespoons sugar, for brulée topping

1.  Preheat oven to 325°F. Place six ramekins in a large roasting pan and arrange 5 cherries in the bottom of each.

2.  In a saucepan over medium heat, combine cream, 3/4 cup reserved cherry syrup, 1/2 cup sugar and almond extract. Stir until sugar dissolves, then bring to a simmer. Simmer gently for 10 minutes, stirring occasionally. Remove from heat.

3.  In a mixing bowl, whisk egg yolks until well blended. Gradually add hot cream mixture and whisk to combine.

4.  Divide custard among ramekins. Pour hot water into the roasting pan until it’s halfway up the sides of the ramekins. Carefully transfer pan to oven.

5.  Bake 35 minutes or until almost set (the center of each custard should wiggle when gently shaken). Using a large slotted spoon or tongs, carefully lift custards out of the water. Cool 30 minutes, then refrigerate for at least 3 hours and up to 2 days.

6.  When ready to serve, sprinkle 2 teaspoons of  sugar over each custard, turning and tapping the ramekin to evenly coat. Using a small kitchen torch, carefully move the flame across each until the sugar melts and browns, about 2 minutes. Refrigerate for at least 10 minutes and up to 2 hours, then serve.

Wednesday, April 6, 2011

Blackberry-Lemon Pie

I think my recent trip to the Dangerously Delicious pie truck may have subliminally influenced me more than I realized, because I was definitely craving pie last week.  And even though "easy as pie" may be one of those overused clichés, this seriously has to be one of the easiest pies I've ever made.  And, more importantly, it is by far the best pie I've ever made...if I do say so myself : ) I can't take too much credit though, because it was mostly due to the secret ingredient...

Blackberry is always my go-to pie because, well, it's my favorite.  But it's also an easy option because the fruit doesn't really take much prep work before going straight into the pie.  I know blackberries aren't exactly in season right now, but rhubarb is really the only pie-worthy ingredient in season right now, and I have to confess that I'm not a fan (don't hate me because I'm anti-rhubarb).  Anyways, I know a lot of us are often too busy to even cook dinner after work, let alone bake, but just pair a few pints of blackberries with a couple of refrigerated or frozen pre-made crusts and you've got a recipe for a super quick and delicious homecooked pie on a weeknight.

As for that secret ingredient...this was my first time using quick-cook tapioca in a pie.  I know, I know, it's nothing revolutionary, but I've never used anything other than flour or cornstarch to thicken a pie and this made all the difference.  The tapioca helps the fruit juices to congeal, forming a pie with more structure and, thus, seemingly more satisfying slices.  That being said, be careful not to go overboard on the tapioca, you don't want to end up with Jell-o pie. Or maybe you do, but that's up to you.

Blackberry Lemon Pie
2 store bought crusts, or your favorite recipe
4 cups blackberries
3/4 cup sugar
1 tsp cinnamon
1 tsp almond extract
1 Tbs lemon zest
1 Tbs lemon juice
1/4 cup Quick-cook Tapioca

1.  Preheat oven to 400 degrees.  In a large bowl, toss berries with sugar, cinnamon, almond extract, lemon juice, zest and tapioca in a large bowl and set aside for 15 minutes.

2.  Line a 9-inch pie plate with one of the pie crusts and fill with fruit mixture.  Cover with the remaining pie crust, flute and crimp edges to seal, and cut slits in top crust for steam to escape. If desired, place pie plate on a baking sheet to catch any juices that may overflow.

3.  Bake for 45-50 minutes or until browned and juices for bubbles that burst slowly.

Monday, March 28, 2011

Dangerously Delicious

I won't say I was the first person to claim pie could be "the next cupcake," but let's just say I was one of the first :) Similar to cupcakes in individual serveability, ease of portability, nostalgia factor and seemingly endless range of flavor possibilities, pie has all the makings of the next big "it" dessert.  By now this is nothing new, and Rodney Henry, owner of  Dangerously Delicious Pies, was WAY ahead of the curve, opening his first shop in Baltimore roughly 10 years ago.

And these are more than just your run-of-the-mill pies; voted Best Pie in DC for 2011 and featured on such programs as The Food Network's Paula Deen's Best Dishes and Throwdown with Bobby Flay, you know they must be on to something.  The first thing you'll notice about Dangerously Delicious is their rock n' roll attitude; the pie-and-crossbones logo lets you know this isn't your grandma's pie (though just as lovingly handcrafted), next you'll notice the flavors--more than you can shake a rolling pin at. Featuring both sweet and savory pies, Dangerously Delicious offers over 35 varieties of fruit, cream, custard, meat and vegetable pies...and that doesn't even include the quiches!!

So, When I heard that a branch of Dangerously Delicious was coming to D.C., I was excited.  I was more than excited.  I was eagerly waiting for several months of anticipation while the DC opening was slightly delayed and I was out of the country and unable to enjoy pie glory.  Until now.  Luckily for us, Dangerously Delicious has joined the fray of food trucks taking to the streets of downtown DC and I was recently blessed with a day off and unseasonably warm weather to finally try out a slice.

I got there around 1:30pm and the truck had almost been swept clean.  Luckily I got the last slice of apple crumb and was gifted a with a little extra too to finish off the pan.  The pie had plenty of fruit filling and was loaded with crumb topping and I have to say that the pie totally lived up to the hype, but maybe not the price--$6.50 for sweet pie and $7.50 for a savory is a little steep for me, but where else can you get a warm slice of homemade pie to finish of your lunch?  Luckily I don't work downtown or these delicious pies really could be dangerous :) 

If you go:
1339 H St NE
Washington, DC 20009

2839 O'Donnell St
Baltimore, MD 21224

Twitter:

Thursday, March 17, 2011

Luck O' The Irish Cream Cupcakes

St. Patrick's Day: That day when we're all Irish. That day when Irish eyes are smiling. That day when we throw shooters of Bailey's into pints of Guinness and slurp it all down between plates of green eggs and ham and never feel the need to stop and ask, "What is wrong here??"  : )

This time of year, I usually look forward to making Irish Soda Bread but, when compared to boozed-up cupcakes, the soda bread started to sound a little...tame.  These cakes are made with not one but TWO shots of Irish hospitality in the form of  Guinness stout in the chocolate cakes and Irish cream liqueur in the frosting.  Needless to say, you'll want to make sure these don't accidentally get mixed in with Junior's cupcakes on the way to the school St. Patty's party...though you may want to include one for the teacher : )
Cupcakes with Corned Beef cooking in the background--How Irish of me
I know Guinness chocolate cake may sound like an odd combination, but the addition of the stout adds a complex depth to the chocolate flavor and helps make the cakes oh-so-moist.  As for the Irish cream frosting--I'm pretty sure it just doesn't get any better than this.  Pair one of these with a plate of corned beef and cabbage, a shot of Jameson, and I think even St. Patrick would be proud.  

Chocolate Guinness Cupcakes
     from The Culinary Chronicles
1 cup stout beer
1 cup unsalted butter
¾ cup unsweetened cocoa powder
2 cups all purpose flour
2 cups granulated sugar
1½  tsp baking soda
¾ tsp salt
2 eggs
⅔ cup sour cream

Irish Cream Frosting
4 to 5 cups powdered sugar
2 cups unsalted butter, at room temperature
4 to 5 Tbs Irish Cream Liqueur

1. Preheat oven to 350 degrees F. Line cupcake cups with paper liners.

2. Put the butter with the stout beer in a sauce pan over medium heat and bring to a simmer. Whisk in cocoa powder until smooth. Cool slightly.

3. In a large bowl, whisk the flour, sugar, baking soda and salt. In a mixer bowl, beat the eggs and the sour cream together. Add the beer/butter/cocoa mixture and beat to combine. Add the flour mixture and beat briefly just to combine. Using a rubber spatula, fold the batter until completely combined, making sure to incorporate little pockets of flour on the bottom so that the batter is of equal consistency everywhere.

4. Fill the cupcake liners about 2/3 of the way if you want flatter cupcakes and 3/4 if you want domed. Bake for about 17 minutes, or until a toothpick inserted into the middle of a cupcake comes out clean. Cool completely to room temperature.

Prepare the frosting: In a large mixer bowl, whip the butter for several minutes until very light and fluffy. Slowly add about half of the powdered sugar a few spoonfuls at a time until incorporated. Slowly drizzle the Irish Cream and whip until combined. Add the rest of the powdered sugar until your desired consistency has been achieved.

Assemble: Fill a pastry bag and pipe buttercream on top of cooled cupcakes. Garnish with sprinkles or other adornments. Slainte!

Tuesday, March 8, 2011

Let Them Eat (King) Cake

Cake may not be the first thing you think of when you hear the words "Mardi Gras." More likely, you have visions of raucous debauchery heralding the last hurrah before 40 days and nights of oh-so-exciting Lenten deprivation. But in addition to beads and booze, King Cake is another (albeit tamer) New Orleans Mardi Gras tradition--harkening back to the Christian three kings tradition--inexpicably immortalized by a coffee cake doused in icing and colored sugar.

To celebrate Mardis Gras of the past, I've made the French style of King Cake that inspired the American version we celebrate with today, as well as a total lazy person's King Cake back when I was afraid of yeast. But this year I decided to go all out for a friend's Mardi Gras-themed dinner party and finally attempt the New Orleans style of cake we all know from this time of year.

When I decided to take the King Cake plunge I knew right away that I wanted to go with a recipe from David Guas--well-known in the DC area for bringing a taste of the Big Easy to Arlington, VA with his new cafe Bayou Bakery, and also for his tome of amazing southern-style New Orleans sweets, DamGoodSweet.  At the party I also finally had a chance to sample Bayou's beignets (behn-yay, or French-style doughnuts) and cupcakes along with a delcious feast of gumbo, étouffée, kale chips, crawfish and muffaletta crostini courtesy of Department of Plate. The beignets and king cake were the perfect ending to our Cajun cuisine and helped "let the good times roll" as they say down south...sans flashing and open containers of liquor, of course. :)

A couple of notes: this cake is made with yeast (you're essentially making a sweet loaf of bread) so leave yourself plenty of time to allow for its two rises.  Also, the icing dries quickly, so be sure to have your colored sugar prepped before you start frosting as you'll want to be able to sprinkle liberally before it hardens.   
Beignets and cupcakes!


David Guas' King Cake
1 (1-1/4-oz.) package dry-active yeast
1/4 cup warm milk (105°F–115°F or warm to the touch)
1 cup plus 6 Tbs. bread flour plus extra for rolling
1 Tbs. honey
3/4 cup cake flour
2 large eggs
1 large egg yolk
2 Tbs. granulated sugar
1/2 tsp.ground cinnamon
1/2 tsp. pure vanilla extract
1/4 tsp. almond extract
1 tsp. table salt
5 Tbs. unsalted butter,   at room temperature
1 plastic baby figurine (to hide in the cake), optional

For the egg wash:
1 large egg
1 Tbs. milk

For the icing and decoration:
2 cups confectioners’ sugar, sifted
2 Tbs. light corn syrup
3 Tbs. milk
1/4 tsp. pure vanilla extract
3 cups granulated sugar
Green food coloring
Gold or yellow food coloring
Purple or red and blue food  coloring

1. Whisk the yeast with the warm milk in the bowl of a stand mixer until dissolved. Add the 6 tablespoons of bread flour and the honey and, using the paddle attachment, mix on low speed until fairly smooth (there will still be a few lumps), 30 seconds to 1 minute, scraping the bottom and sides of the bowl as necessary.

2. Cover with plastic wrap and let rise until doubled in volume, about 20 minutes.Once the dough has doubled, add 3/4 cup of the remaining bread flour, the cake flour, eggs, egg yolk, sugar, cinnamon, vanilla and almond extracts, and salt. Mix on low speed until combined, then switch to a dough hook, increase the speed to medium, and beat until smooth, about 2 minutes. Increase the speed to medium-high and begin adding 4 Tbs. of the butter 1 Tbs. at a time, mixing well between additions. Continue to knead until the dough forms a slack ball (it will ride the dough hook, be tacky, and not slap the bottom of the bowl, but it should generally come together into a loose mass), 2 to 3 minutes. If the dough doesn’t come together, continue kneading while adding up to 1/4 cup of the reserved bread flour, until it does.

3. Grease a large bowl with 1/2 Tbs. of the remaining butter and transfer the dough to the bowl, turning it over in the bowl to coat with butter. Cover the bowl with a piece of plastic wrap or damp kitchen towel and place the bowl in a draft-free spot until the dough has doubled in size, about 1 hour.

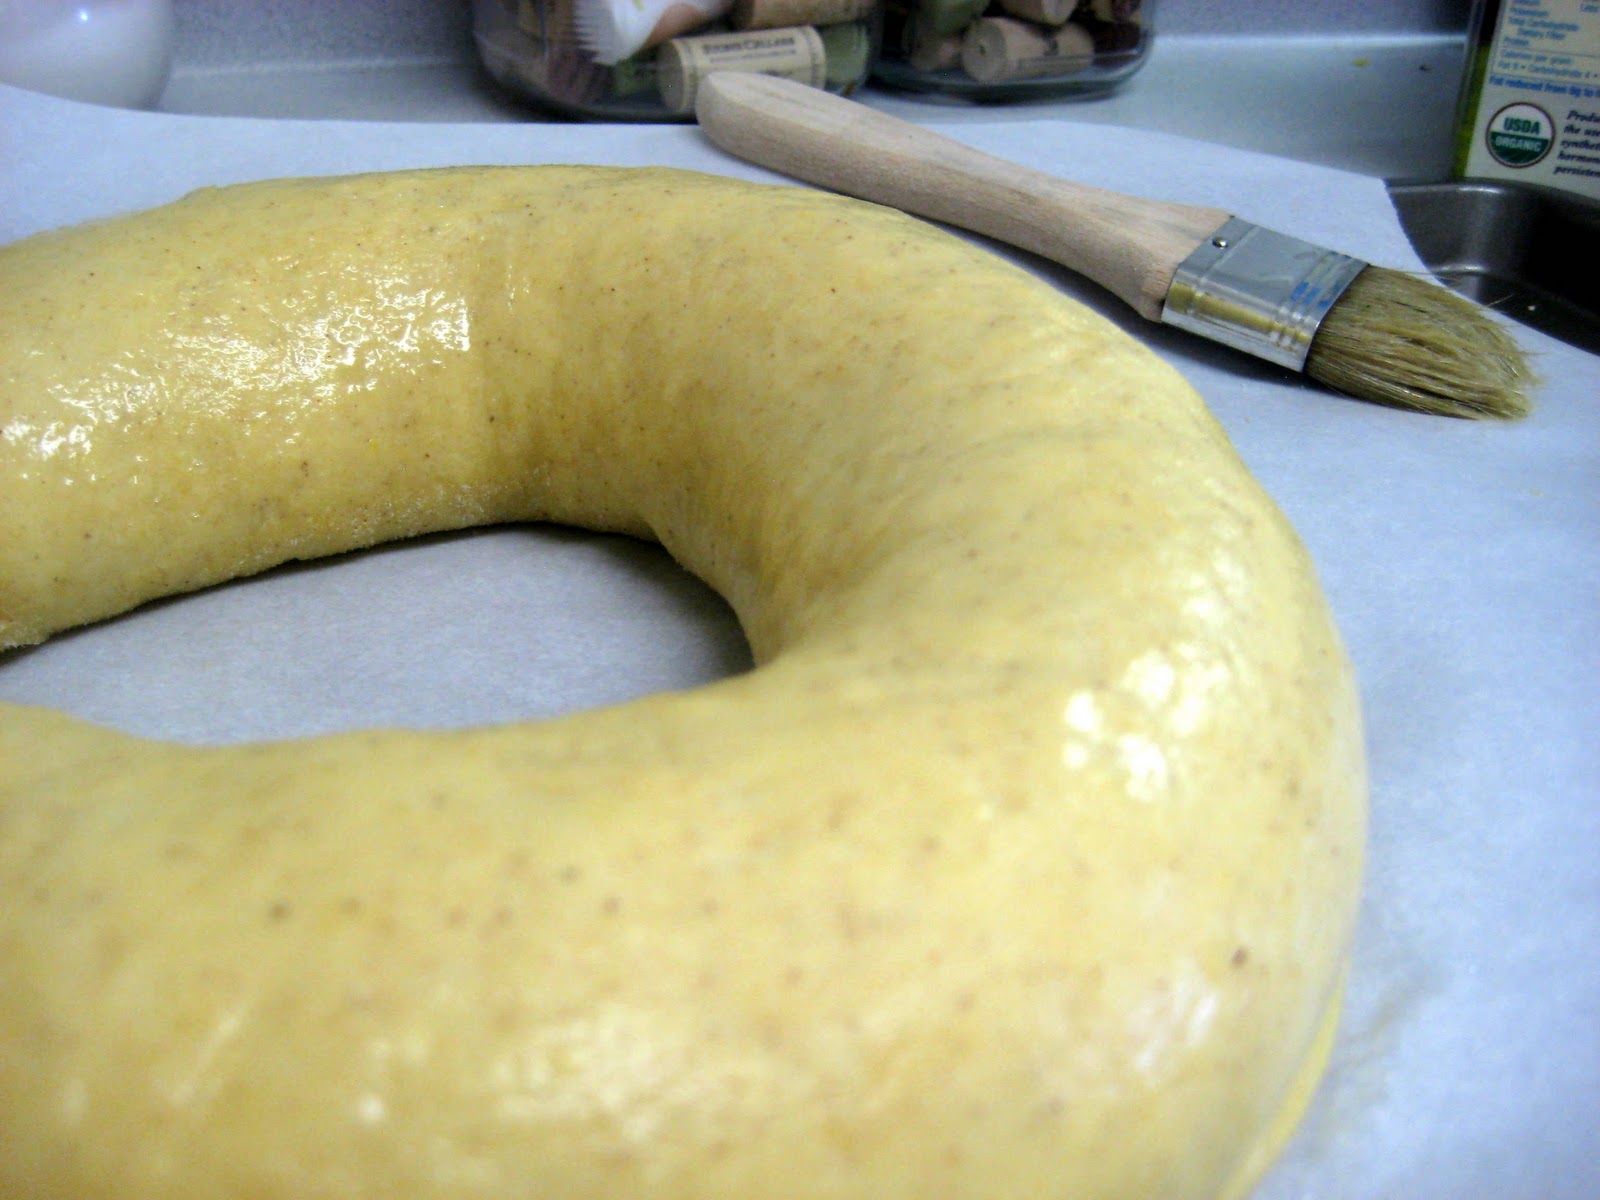
4. Line a rimmed baking sheet with parchment paper and grease the parchment paper with the remaining butter. Generously flour your work surface using the remaining 1/4 cup of bread flour (if you used the bread flour in the dough, dust your work surface with more bread flour). Turn the dough out onto the work surface and sprinkle the top with some flour. Use your hands to press and flatten it into a rectangle. Using a rolling pin, roll the dough into a 1/4-inch-thick strip that is about 24 inches long by about 6 inches wide. Starting with one of the long sides, roll the dough on top of itself, making a long, thin baguette-shaped length. Pinch the edge to the body of the dough to seal, turn the dough so it lies horizontally on your work surface, and gently roll it on your work surface to even out any bulges and create a somewhat consistent 1-1/2-inch-wide rope. Bring the two ends of the dough together and pinch them into one another to seal. Carefully transfer the dough oval or circle to the prepared sheet pan. Cover with a piece of plastic wrap or a damp kitchen towel and set in a warm, dry spot to rise until doubled, about 1 hour.

5. Heat the oven to 375°F. To make the egg wash, whisk the egg and the milk together in a small bowl. Brush the egg wash over the top and sides of the dough, and bake the king cake until golden and cooked through, 25 to 30 minutes. Immediately after removing the cake from the oven, make a small slit in the bottom of the cake and insert the baby figurine (if using). Set on a rack to cool completely.

To make the icing:While the cake cools, make the icing. Whisk the confectioners’ sugar, corn syrup, milk, and vanilla together in the bowl of a stand mixer on low speed until smooth and completely incorporated. Cover the bowl with a damp kitchen towel until you are ready to glaze the cake.
To make the colored sugar, measure 1 cup of the sugar into each of 3 resealable quart-size plastic bags. Add 4 drops of green food coloring to one bag, 4 drops of gold or yellow food coloring to another bag, and 4 drops of purple food coloringto the last bag (if you don’t have purple, make it yourself: measure 2 drops of red and 2 drops of blue food coloring onto a spoon and mix with a cake tester or toothpick until combined). Seal each bag and then vigorously shake to combine the sugar and food coloring.Spoon the icing over the cooled cake. Immediately after icing, decorate with the tinted sugar.

Saturday, March 5, 2011

Preview: Pound The Hill

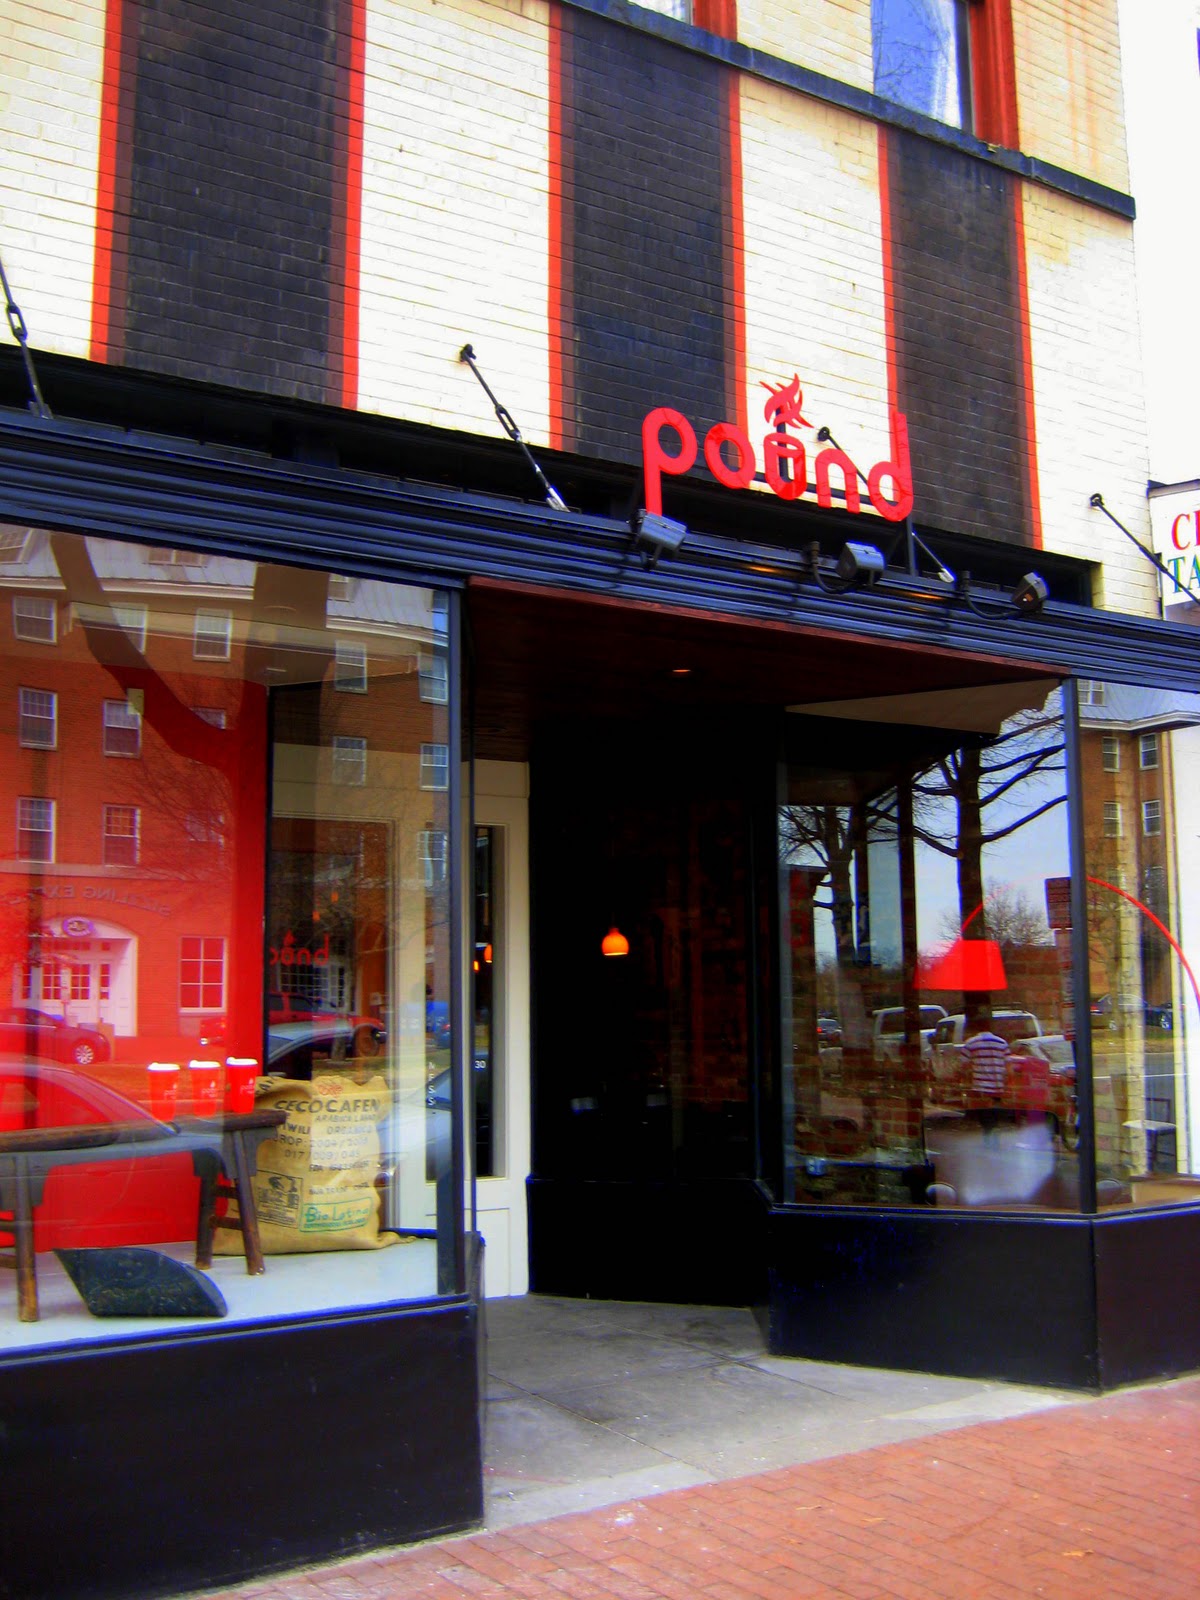
This weekend I was extremely lucky to get an early look at brand new coffee shop Pound the Hill, which has the potential to be the coolest spot to hit Eastern Market since, well, Eastern Market. Simultaneously urban and inviting, Pound sets itself the Herculean task of being a coffee shop/cafe/travel bar/neighborhood-spot-with-international-flare and succeeds on all accounts.


Nestled between hot spots We The Pizza and BaBay, Pound has a prime location on Pennsylvania Avenue and a prime location in DC's coffee market with a unique, niche concept. In addition to serving up your standard coffee shop favorites, Pound also offers a full rotating menu of international specialties. Inspired by their love of travel, the partners crafted a menu reflecting world cuisine and also plan to stock Pound's bookshelves with travel guides so that patrons inspired by the daily fare can plan their next trip. Additionally, Pound also features responsibly grown products like Kickapoo organic, Fair Trade coffee and Tevolution teas--a brand new bottled tea company which donates part of your purchase to charity and allows to you track online where your money goes.

So why should a baking blog be concerned with the newest coffee shop in town? Because their eclectic, international menu isn't limited to fare from around the globe, but they also feature a variety of house-baked goods to pair with your coffee to include scones, cinnamon rolls, cheesecake and yes, rumor has it...there will be cupcakes :) Pound is bringing on a new pastry chef and currently working to perfect a nutella baklava to pair with their nutella latte, so you can bet I will be back to sample all the goodies Pound has on offer...and more nutella lattes, obviously.

Pound The Hill is soft-opening next week with the full menu to be served beginning March 14th. In the meantime they will be giving away 1,000 of their signature Nutella Lattes during the first 10 opening days. Simply be one of the first 100 each day and mention a promotional code from Pound's Facebook or Twitter page to claim yours (believe me, it's as incredible as it sounds). With plans for an outdoor patio and liquor license (and cupcakes!) within the next 6 months Pound is sure to be a lasting gem in DC's coffee scene.

If you go:
Pound
621 Pennsylvania Ave SE
Washington, DC
Metro: Eastern Market (Blue/Orange Line)