I'm a sucker for weird ingredients. Ok, let's call them "unique" ingredients. Whenever I come across a new, uncommon ingredient that I know will likely use a single time or, more likely, never actually use, it's hard for me to resist buying it anyways in the hopes of giving it a whirl.
Like that pot of Adriatic fig spread I once ate with pears.
Or the jar of tahini I used the single time I made falafel.
Even when I show self restraint, my mind always wanders back to that ingredient on the store shelf and I invariably give in with an "Oh, what the heck." Such was the case with the cans of Almond Cake and Pastry Filling. For some inexplicable reason making a prominent appearance that I don't remember from holiday seasons past, I had successfully avoided making the purchase of this odd ingredient back home--though I admit to picking up a can several times and actually wondering out loud--"What do you use this for??" While home visiting family, however, it was a different story. I mean, what better way to experiment with a strange new ingredient than in someone else's big, well-appointed kitchen? :)
The back of the Solo-brand can quickly gave me a couple of ideas on what, exactly, you do use this product for. One of which was an almond bundt cake. BORING. Doing a quick search on the interwebs I came across a delightful almond cake recipe from one of my fave chefs, David Lebovitz, and couldn't wait to try the simple yet moist cake. If you haven't read David's book, The Sweet Life in Paris, put it on your holiday reading list now because the man is hysterical.
Also to all of you out there that say baking is too difficult: While there is some truth to the saying that "Cooking is an art, but baking is a science," let me tell you that you can mess up a lot more than you think before it will actually affect your recipe. Case in point: almond filling is NOT almond paste. This was mistake #1 in my attempt to recreate David's divine recipe in the blind desire to try out my can of almond filling. #2) after searching the house top to bottom, Mom and I came to the conclusion that she must not, in fact, own the 2 round cake pans that she and I distinctly remembered her owning. No matter, I made this cake in a round springform pan instead and, you know what, this cake was still amazing! It has incredible almond flavor and was still extra moist, as promised.
David Lebovitz's Almond Cake
1 1/3 cup sugar
3/4 cup almond paste (not marzipan, maybe almond filling)
10 ounces unsalted butter, at room temperature
6 large eggs, at room temperature
1 tsp vanilla extract
1 cup all-purpose flour
1 tsp baking powder
1/4 tsp salt
1. Preheat the oven to 325 degrees. Butter a 9" round cake pan (or springform pan) and dust it lightly with flour, tapping out any excess.
2. With an electric mixer, beat together the sugar and almond paste (or reduce sugar to 1 cup if using almond filling).
3. Now add the butter and beat for a few minutes until light and fluffy. In a separate bowl, or a measuring cup with a spout, stir together the eggs then dribble it into the batter as you beat. Add the vanilla.
4. In a separate bowl, whisk together the flour, baking powder and salt. Stir the dry ingredients into the batter until just incorporated.
5. Transfer the batter to the prepared pan and bake for about 1 hour, or until a toothpick in the center comes out clean. Some variation in baking time may be needed depending on the brand of almond paste. This cake is extremely moist and, if wrapped well, will keep up to a week.
Saturday, December 26, 2009
Monday, December 21, 2009
Top Secret Sweets
Moonlighting as a restaurant hostess extraordinaire in the nation's capital, I often have conversations with guests that I walk away from thinking, "Did that really just happen?" Case in point, a recent exchange with one unassuming gentleman:
"I'm waiting for my friend. She used to be a chef for the CIA."
"Oh, haha!" I retorted to this common culinary conundrum in Washington, DC. Whenever throwing around an acronym like that in a town like this you can never be quite sure whether the speaker is referring to the Culinary Institute of America or, well, that place where Jason Bourne likes to hang out. In this case, it happened to be the latter, instantly summoning up images of another famous spy chef enjoying a recent bout of popularity.
Anyways, if you want to tell your friends you whipped up a creation with help from the CIA and leave them wondering, just in time to use up those holiday gift cards that other CIA is releasing a new tome to help you create candied confections in your home kitchen (or secret spy lair) just like the professionals. Chocolates and Confections at Home with The Culinary Institute of America is an unpretentious, step by step guide to help you tackle all types of sweets by taking the intimidation factor out of words like "candy thermometer" and "soft-ball stage." With chapters on truffles, brittles, fondants, marshmallows (!), molding and more, these recipes will be perfect to round out your holiday treat-making schedule once you just can't bring yourself to decorate another single gingerbread man.
So, when you arrive to your next holiday bash with a plate full of delicious buttercreams and meltaways and the host asks for your recipe, just be sure to say, "I'd tell you, but then..."
Monday, December 14, 2009
Attack of the Gingerzombies
I have a slight obsession with World Market. This has been ongoing ever since my days as a poor college student when I first walked there (yes, walked) to buy the requisite dorm room place setting of a single plate and bowl. Thanks to World Market, instead of the typical bag of 500 paper plates gathering grime on top of the mini-fridges of my fellow students, I got a sleek, Asian-inspired, MATCHING black ceramic plate/bowl set for about $10. Now that I'm getting more into cooking and exotic foods, World Market is still my first stop as they import tons of ethnic goodies from around the world and stock them at affordable prices (All spices are $1.99-$2.99. Yes, all of them. Even vanilla beans and whole nutmeg. Believe it). So, I was very excited last week when I found my favorite store also branching out into cupcakes. Nestled somewhere between the English clotted cream and the Italian fruit syrups I happened to spy this friendly looking canister cupcake kit.
Complete with gingerbread cupcake mix, cinnamon frosting mix, white sprinkles, cupcake liners and gingerbread people cupcake toppers, the Jo Cupcake brand kit contains everything you'll need to whip up 8 holiday-themed cakes in no time.
It's been awhile since I've made a dessert from a box (and definitely a first for one from a canister) but there are a few things I admire about pre-packaged mixes. The first is consistency; the ingredients are well-mixed and perfectly proportioned and you can pretty much count on what you're going to get every time. Portion control is also a plus; generally you're not going to end up with enough dessert to feed an army (here's looking at you, Martha, and your recipes for 36 cupcakes). Finally, time and money; when you don't have a lot of time or resources, packaged mixes are great for getting that home cooked feel in a jiffy and on a dime. As for this particular mix, it cost $4.99 and I'd give it a B+.
What I liked
- Seasonal decorations included. These are the kind of details that really make a dessert stand out on a holiday table but that can also send the cost of your recipe sky high. The fact that they are included in the kit really gives you a lot of bang for your buck.
- Amazing frosting. The flavor and color of the cinnamon icing really pack a punch and it's a great complement to the gingerbread cake.
- Great texture. These cakes came out soft and spongy and were still delicious the next day as well.
- Where's the batter? There wasn't really enough mix to fill all 8 liners, and I only got about 6 1/2 cupcakes out of the batter.
- "They taste like gingerbread-flavored Necco wafers." I don't recommend actually eating the gingerbread people cupcake toppers. Unless you're looking for some dental work on the cheap.
- Gingerzombies. Most of the cupcake toppers had also gotten damaged in transit. Try not to notice the empty, eyeless stares of the ones in the pic below.
Wednesday, December 2, 2009
The Magical Midwest Bakery Tour, Pt. II
Possibly spurred by my inexplicable lack of cupcake baking of late, my cupcake eating has somehow not suffered in the least. After cupcakeing my way through New York, Paris, Chicago and Boston during the past four months, I saw no reason to stop on my Thanksgiving trip home last week to Columbus, Ohio. With hometown faves Pink Moon and Bakery Gingham under my belt, I was excited to checkout two more cupcakeries in the Historic Dublin area of northwest Columbus. Located just a few storefronts apart, Our CupCakery and Sugar Inc. Cupcakes are both perfect stops after a late fall stroll amongst the quaint shops of Historic Dublin.
And when I say "historic", I mean OLD :) Settled in 1810, nearly every building on High Street proudly displays a plaque denoting its status on the National Register of Historic Places. Nestled in one such stone building was our first stop, Our CupCakery. Primarly a custom-order bakery, this shop also offers a small selection of cupcakes to-go and a unique, build-your-own cupcake bar that is beyond fun. Sorry, no cocktails at this cupcake bar. Set up assembly line style and sold by weight, Our CupCakery provides a selection of several cake choices, fun frostings, toppings and sprinkles for you to create your very own masterpiece. I went with the delicious combo of almond cake, coffee frosting and Heath bar crumbles. As you can see, my brother was a little more adventurous with his choice of red velvet cake, raspberry frosting, Ohio State Buckeye sprinkles and a side of gummy worms and Coke bottles. But, I have to admit, the combo of red velvet and raspberry was delicious--he's clearly the artiste of the family.
If one cupcake stop just isn't enough (and when is it ever?) just continue a few steps down N. High St. to Sugar Inc. Cupcakes & Tea Salon. Outfitted in pale blue and light wood accents and featuring 100% organic cupcakes, this outpost of cupcake zen is possibly the most inviting cupcakery I've ever been to. With ample seating room, abundant natural light, a small food menu and 50 fresh-brewed teas to choose from, it was a delight to sip our tea and nibble our cupcakes in such a relaxed environment. The day we came in there were a few cupcake flavors left on offer including Madagascar Bourbon vanilla, dark chocolate, strawberry and, of course, Buckeye. We sampled a selection of minis, with dark chocolate the runaway hit. The cake was so moist it practically fell apart, and I was also a fan of the decadent peanut butter "silk" frosting. I've never had 100% organic cupcakes before and was afraid that some of the sweetness would suffer, but not so. The only downside with this sweet shop is that you also get what you pay for--at $3.75 for a cupcake and $1.50 for a mini, these are also the most expensive cupcakes I've sampled. Though, I do have to say, the experience is definitely worth it and you can bet I'll be back on my next trip home for Christmas.
P.S. Just in case you're not in the mood for cupcakes (gasp!), stop by Jeni's ice cream at the corner of High and Bridge streets if you happen to find yourself in Dublin (next year's Memorial Tournament, perhaps?). With flavors like White Chocolate Evergreen with Red Currant Garland and Goat Cheese with Cognac Fig Almond Compote, I can promise you it's like no ice cream you've ever had. Not planning on making it to Ohio anytime soon? Oh yes, they deliver... :)
If you go
Our CupCakery
16 N. High St.
Dublin, OH 43017
Tues-Sat 11am-5pm
Sugar Inc. Cupcakes & Tea Salon
36 N. High St.
Dublin, OH 43017
Mon-Sat 11am-9pm
Jeni's Splendid Ice Creams
1 Bridge St.
Dublin, OH 43017
Apr-Sept 11am-11pm
Oct-Mar 12pm-10am
Wednesday, November 25, 2009
Beantown Cupcakes and Johnny Notcakes
I think my cupcake obsession is complete. I am now entirely incapable of traveling anywhere without seeking out local bakeries for my cupcake fix. Such was the case on last weekend's trip to Boston when I got a double whammy of cupcake glory with stops at Cambridge's Sweet Cupcakes and world famous "T-shirt bakery" Johnny Cupcakes.
Just across the Charles River and down the street from that fancy school where you can't actually park your car in the yard (I checked), Harvard Square's Sweet is an adorable neighborhood shop conveniently located adjacent to the T's red line Harvard Square stop. Even before sampling a single bite, two aspects of Sweet immediately shot them to the top of the list among other cupcake bakeries that I've tried: a significant selection of flavors still left in the case even in the late afternoon and--BEVERAGES! Though it might seem obvious that cupcake customers could want a chaser for their cakes, you'd be surprised how many cupcakeries don't sell drinks at all, or offer a single incongruous choice like soda. In addition to coffee, Sweet offers a variety of cold beverages including milk, water and juice. One Sweet downside common to cupcakeries though is the small seating area. Sweet only has three tables that seemed to be occupied by people more concerned with staring out of the plate glass window rather than eating cupcakes. Ah, well.
Sweet's variety of cupcakes actually made flavor selection that much more difficult, but I'm sure you all can guess that I managed to narrow it down somehow :) In addition to everyday flavors Sweet also offers an unusually large number of seasonal and holiday flavors. People, these flavors are so unique and incredible. Chocolate Orange, Molasses Ginger and Chocolate Cranberry are just a few they have on offer for the fall season and the holiday menu kicks off this Friday, November 27th. With flavors like Gingerbread, Butterscotch, Eggnog and Chocolate Pomegranate it will be hard not to come back for more. I sampled the S'mores, Caramel Apple and, of course, Boston Cream Pie. Though the S'mores cupcake pretty much fell apart while eating (user error, I'm sure) I loved that it had the generous dose of graham cracker often missing from similar cakes. The Caramel Apple came with a spicy apple filling, caramel glaze and it's very own adorable stick just like the real thing. As for the Boston Cream, this is the moistest cupcake I have ever eaten. Ever. The chocolate ganache was a perfect compliment for this must-try Boston standby.
If Cambridge is out of the way on your trip to Boston, you can also stop by Sweet's Back Bay location. And don't shy away from bringing Fido--Sweet even has "Pupcakes" on offer for $1. At either location I'm sure you'll be pleased with the chic flavors and friendly staff at Sweet and I definitely recommend a stop if you're in the neighborhood (or even if you're not, it's totally worth it).
If you secretly (or not so secretly) suspect that you may have a cupcake obsession like me, while you are in Boston also make sure to stop by T-shirt boutique Johnny Cupcakes. For serious shoppers, Johnny's is nestled amongst the converted brownstones of Boston's trendy Newberry Street shopping district- 8 blocks of eclectic stores and restaurants. After copious amounts of window shopping at their online store, I was psyched for my first chance to step foot in one of their actual stores. An apparel company started from scratch (yes, that's a baking joke) by Johnny Earle/aka Johnny Cupcake in 1989, though this shop may look like a bakery, you'll be disappointed if you come in expecting actual cupcakes. Each of the cases is filled with limited edition t-shirts featuring Johnny's signature Cupcake-And-Crossbones design. The perfect combo of cutesy cupcake and edgy design, I picked up this little number for myself.
If you go:
Sweet
Brattle St at Harvard Square
Boston, MA
Mon-Tues 11am-9pm
Wed-Sat 11am-10pm
Sun 12 noon-8pm
Johnny Cupcakes
279 Newberry St
Boston, MA
Mon-Thurs 11am-7pm
Fri-Sat 11am-8pm
Sun 11am-7pm
If you go:
Sweet
Brattle St at Harvard Square
Boston, MA
Mon-Tues 11am-9pm
Wed-Sat 11am-10pm
Sun 12 noon-8pm
Johnny Cupcakes
279 Newberry St
Boston, MA
Mon-Thurs 11am-7pm
Fri-Sat 11am-8pm
Sun 11am-7pm
Tuesday, November 17, 2009
Cheesecake On The Half-Shell
"What is that?"
"Pumpkin Turtle Cheesecake."
"But what does that mean?"
"It's cheesecake you serve on the half-shell, duh."
"..."
"Juuuust kidding."
Though this recipe is actually called "Pumpkin Praline Cheesecake," I wasn't able to make the tasty pecan praline powder called for in the recipe that dusts the top of the cheesecake because I don't have a food processor (that's right people, I don't even own a blender). So, instead, I reached for my trusty go-to jar of caramel sauce, mixed a dollop in a bowl with pecan halves and used that to set off the layer of sweetened sour cream below and voila: Pumpkin Turtle Cheesecake. Or, as I've been calling it, Teenage Mutant Ninja Pumpkin Turtle Cheesecake.
Just as the term "Black Forest" is often applied to about any combination of chocolate and cherry, "turtle" has come to symbolize the delicious mixture of caramel and pecans. This is undoubtedly due to Nestle's Turtle candies, first produced by the Rowntree DeMet company in the 1920s, and made from simply caramel and pecan halves before being dipped in chocolate. The story goes that a DeMet's employee commented that the new candies looked surprisingly like turtles and the rest is history. Who knows.
All I know is that, if I've done my job, you'll now have the Teenage Mutant Ninja Turtles' theme song in your head :) But, believe me, this cheesecake is so good that your friends probably won't even mind that you're singing it to them as you serve up the slices.
Pumpkin Praline Cheesecake
1/3 cup butter
1/4 cup packed brown sugar
1 cup flour
3 8-oz pkgs cream cheese, softened
3/4 cup packed brown sugar
2 Tbs flour
1 15-oz can pumpkin
1 tsp vanilla
1/2 tsp ground cinnamon
1/2 tsp ground ginger
1/2 tsp ground nutmeg
3 eggs
1 8-oz container sour cream
1 Tbs granulated sugar
Pecan halves (optional)
1/2 cup granulated sugar
1/2 cup chopped pecans
1. For Pecan-Praline Pieces and Powder, line a large baking sheet with foil and set aside. In a heavy skillet place the 1/2 cup granulated sugar, cook over medium-high heat, shaking skillet occasionally until sugar begins to melt. Do not stir. Reduce heat to low and stir in the chopped pecans; cook about 3 minutes more or until sugar is golden brown and pecans are toasted, stirring occasionally. Pour the mixture onto the prepared baking sheet, spreading with a wooden spoon as thin as possible. Cool. Break or chop the cooled praline into 1/4-inch pieces and set half of it aside. For Pecan-Praline Powder, place remaining broken pieces in a blender container or food processor bowl. Cover and blend or process until ground. Store in separate containers in refrigerator or freezer up to 1 week.
2. Preheat oven to 375 degrees. For crust, in a medium mixing bowl beat butter with an electric mixer on medium to high speed about 30 seconds or until softened. Add the 1/4 cup brown sugar and beat until fluffy. Add the 1 cup flour. Beat on low to medium speed just until combined.
3. Pat dough onto bottom and 1-1/2 inches up the side of 9-inch springform pan. Bake for about 10 minutes or until lightly browned. Cool crust on a wire rack while preparing filling.
4. For filling, in a large mixing bowl beat cream cheese, the 3/4 cup brown sugar, and the 2 tablespoons flour with an electric mixer on a medium to high speed until combined. Add the pumpkin, vanilla, cinnamon, ginger, and nutmeg. Beat until combined. Add eggs all at once. Beat on low speed just until combined. Stir in the coarsely broken pecan-praline pieces, reserving the powder for the topping.
5. Pour filling into the crust-lined springform pan. Bake for 45 to 55 minutes or until center appears nearly set when shaken.
6. In a small bowl combine sour cream and granulated sugar. Spread over top of cheesecake.
7. Cool cheesecake in pan on a wire rack for 15 minutes. Use a small metal spatula to loosen crust from sides of pan. Cool 30 minutes more. Remove side of the springform pan. Cool for 1 hour. Cover and chill in the refrigerator for at least 4 hours.
8. Just before serving, sprinkle the Pecan-Praline Powder over sour cream topping in center of cheesecake and garnish with pecan halves, if desired.
All I know is that, if I've done my job, you'll now have the Teenage Mutant Ninja Turtles' theme song in your head :) But, believe me, this cheesecake is so good that your friends probably won't even mind that you're singing it to them as you serve up the slices.
Pumpkin Praline Cheesecake
1/3 cup butter
1/4 cup packed brown sugar
1 cup flour
3 8-oz pkgs cream cheese, softened
3/4 cup packed brown sugar
2 Tbs flour
1 15-oz can pumpkin
1 tsp vanilla
1/2 tsp ground cinnamon
1/2 tsp ground ginger
1/2 tsp ground nutmeg
3 eggs
1 8-oz container sour cream
1 Tbs granulated sugar
Pecan halves (optional)
1/2 cup granulated sugar
1/2 cup chopped pecans
1. For Pecan-Praline Pieces and Powder, line a large baking sheet with foil and set aside. In a heavy skillet place the 1/2 cup granulated sugar, cook over medium-high heat, shaking skillet occasionally until sugar begins to melt. Do not stir. Reduce heat to low and stir in the chopped pecans; cook about 3 minutes more or until sugar is golden brown and pecans are toasted, stirring occasionally. Pour the mixture onto the prepared baking sheet, spreading with a wooden spoon as thin as possible. Cool. Break or chop the cooled praline into 1/4-inch pieces and set half of it aside. For Pecan-Praline Powder, place remaining broken pieces in a blender container or food processor bowl. Cover and blend or process until ground. Store in separate containers in refrigerator or freezer up to 1 week.
2. Preheat oven to 375 degrees. For crust, in a medium mixing bowl beat butter with an electric mixer on medium to high speed about 30 seconds or until softened. Add the 1/4 cup brown sugar and beat until fluffy. Add the 1 cup flour. Beat on low to medium speed just until combined.
3. Pat dough onto bottom and 1-1/2 inches up the side of 9-inch springform pan. Bake for about 10 minutes or until lightly browned. Cool crust on a wire rack while preparing filling.
4. For filling, in a large mixing bowl beat cream cheese, the 3/4 cup brown sugar, and the 2 tablespoons flour with an electric mixer on a medium to high speed until combined. Add the pumpkin, vanilla, cinnamon, ginger, and nutmeg. Beat until combined. Add eggs all at once. Beat on low speed just until combined. Stir in the coarsely broken pecan-praline pieces, reserving the powder for the topping.
5. Pour filling into the crust-lined springform pan. Bake for 45 to 55 minutes or until center appears nearly set when shaken.
6. In a small bowl combine sour cream and granulated sugar. Spread over top of cheesecake.
7. Cool cheesecake in pan on a wire rack for 15 minutes. Use a small metal spatula to loosen crust from sides of pan. Cool 30 minutes more. Remove side of the springform pan. Cool for 1 hour. Cover and chill in the refrigerator for at least 4 hours.
8. Just before serving, sprinkle the Pecan-Praline Powder over sour cream topping in center of cheesecake and garnish with pecan halves, if desired.
Monday, November 2, 2009
Pumpkin Crème de la Crème
And now, let the pumpkin posts continue! As promised, the fall parade of pumpkin spice recipes marches on even though we're now in that odd pumpkin limbo time between Halloween pumpkin-themed recipes and Thanksgiving pumpkin-themed recipes. Oh well, clearly I'm not concerned. I recently managed to get my hands on two more coveted cans of pumpkin and couldn't wait to use one for this Pumpkin Crème Caramel.
If you haven't had the pleasure of enjoying crème caramel before, the texture is very similar to a flan or custard, but it also comes with a built in bonus layer of delicious caramel sauce. The seasonal addition of pumpkin pie spice really adds warmth and blends perfectly with the creamy caramel. I'd also even recommend this as an alternative for friends or family that usually don't like pumpkin pie because it is much less sweet than pumpkin pie and the texture is also more dense. I'm actually completely guessing that these might be reasons people don't like pumpkin pie because, frankly, I find it incredulous that these people even exist.
Also don't be intimidated by the pomegranate seeds used as garnish. If you've never used a pomegranate before, let this be your first opportunity. Since this was my first time trying pomegranates I was similarly terrified to tackle what some believe was the true "forbidden fruit" and now I'm addicted to the tangy-sweet seeds. Food blogger Gimme Some Oven has a great tutorial on how to open and seed your pomegranate completely mess-free and, I mean, Web MD tells us that pomegranates are a major superfruit so really, what are you waiting for? You may be consuming the equivalent of 6 eggs, but you might as well fight free radicals with the power of antioxidants at the same time, right? Right.
Note: You can also modify this recipe by preparing it in two pie plates as opposed to individual custard cups if you prefer.
Pumpkin Crème Caramel
serves 8
1 1/3 cup sugar
6 eggs, beaten
2 5-oz cans evaporated milk
1/2 cup sugar
2 tsp pumpkin pie spice
2 tsp finely shredded orange peel
2 tsp vanilla
pomegranate seeds (optional)
1. Preheat oven to 325 degrees.
2. To caramelize the sugar, melt the 1 1/3 cups sugar in a heavy-bottomed skillet over med-high heat, shaking the skillet occasionally. When the sugar starts to melt, reduce heat to low. Cook, stirring frequently, until sugar is golden brown. Remove skillet from heat; immediately pour sugar into eight ungreased, 6-oz custard cups. Quickly tilt to evenly coat bottom of cups.
3. Place cups in two 2-quart baking dishes. Whisk together eggs, pumpkin, evaporated milk, the 1/2 cup sugar, pumpkin pie spice and vanilla in a large mixing bowl. Pour the pumpkin mix over the caramelized sugar. Place the baking dishes on the oven rack. Pour boiling water into the baking dishes to a depth of 1".
4. Bake for 40-45 minutes, or until a knife inserted near the centers comes out clean. Remove cups from water. Cool slightly on a wire rack. Cover and chill for 4 to 24 hours.
5. To serve, loosen edges of custards with a knife. Invert a dessert plate over each custard, turn cup and plate over together. Scrape any remaining caramel that remains in the cup onto the custard. Garnish with pomegranate seeds, if desired.
Labels:
custard and pudding,
fall,
pumpkin spice
Saturday, October 31, 2009
Happy Bake-o'ween!
I can't really explain why Halloween is my favorite holiday. Sure, candy is great, but I can't really go trick-or-treating anymore. Dressing up in costumes is also always fun, although I'm continually upstaged by girls dressed as Little-Miss-Butt-Cheeks-Hanging-Out. I guess any of the activities that we love about Halloween could take place at any other time of the year, but there's just something about the late fall conglomeration of all things spooky that makes October 31st something special.
Since I unfortunately don't have any real plans for this year's festivities I decided to go all out on the sweets instead and, with a little help from the Wilton online decorating shop, I made some killer stenciled sugar cookies as well as some ghoulish Fingers of Fate candied pretzel rods. This was my first foray into using both stencils and candy molds and, I have to say, I'm pretty proud of them for a first attempt.
The Wilton online shop really has a wealth of beginner decorating tools and ideas for cakes, cookies and candy for all holidays and celebrations and, browsing the site a couple of months ago, I happened to come across these stencils and had to have them. I was also intrigued by the colorful candy witch finger candy molds but was nervous; I've never made candy before. I also bought black and green candy melts to make the fingers as well as black decorating sugar for the cookies and everything including shipping still cost less than $20. In the end, both were super simple and just required a little bit of patience and a delicate touch. If you are in any way artistic to begin with, these will be a cinch for you.
For the cookies, I bought a packaged sugar cookie mix and used an easy royal icing recipe, this time substituting powdered egg whites for the real thing. Separate your batch of icing into bowls depending on how many colors you plan to use while the cookies are baking, as royal icing dries very quickly and you'll want to have everything prepped. A couple of other notes, as soon as your cookies come out of the oven you may want to flatten them gently with the back of a spatula in order to have the flattest decorating surface possible. Also remember to make your cookies a little larger than usual to accommodate the background icing as well as the size of the stenciled design. Unfortunately I don't have a picture of it, but I just used a children's paint brush to lightly wet the inside of the stenciled design before sprinkling a healthy dose of sugar on top. After sprinkling, pat the design lightly with your fingertips, remove the stencil gently with both hands and--Voila!For the candy, using the microwaveable candy melts couldn't have been easier and I still have plenty left over. By using another children's paintbrush, it's easy to paint the interior of the fingernail first with the black candy (do this in thin layers allowing time to dry in between to slowly color in the entire fingernail portion). Once this is set, the green candy is used to fill in the mold. Just add a pretzel rod and refrigerate until set. Boo!
Monday, October 26, 2009
Gimme More (Chi-town Cupcakes, Pt. II)
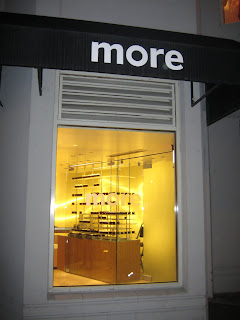
Ok, I'll admit it. I was jealous. After reading Tanya's guest post about all the fabulous cupcakes she got to try during her stay in Chicago, I knew there had to be more that I could sample during my own trip to the windy city last weekend. And after some quick research I certainly found more--More Cupcakery, in Chicago's posh Gold Coast neighborhood. A tiny shop nestled in between stately buildings near the famous Magnificent Mile, this cupcakery is the perfect stop after a full day of (window) shopping at places like Tiffany's, Nordstrom's, Gucci and Louis Vuitton. Or, in my case, the Hershey store.
I have to admit, though, this is the cupcake review that almost wasn't. From the time I landed at Chicago's O'Hare airport it rained. When I woke up the next morning it rained. On the third morning when I trekked out to the suburbs hoping to dodge the rain...it rained. But, finally, the clouds parted Saturday afternoon and it was gloriously sunny. Immediately I dashed out of the hotel, thrilled to be able to take my time finding More without landing ankle-deep in puddles and being poked in the eye by other tourists with umbrellas.
And yet, you will notice not only is the photo of More decidedly NOT sun-drenched, but it is in fact nighttime. I was a little...misdirected. Ok, so I walked in completely the wrong direction. BUT I got to the shop just before closing and still had plenty of designer cakes to choose from. I got seasonal selections pumpkin and apple spice, as well as classic red velvet, and wildcard s'more. The first thing I noticed about More's cupcakes was their height: baked in stiff, brown paper collars that form the cake up instead of out, these tall cakes have a very unique look that sets them apart, even if making it a little more difficult to take a bite. More's shop also has a unique look, displaying cupcakes in a clear, segmented case at eye level, as if they're floating in thin air.
As for flavor, I enjoyed parts of each cupcake individually but thought only the pumpkin was a stand-out winner. If you're a red velvet fan, while I thought the cake lacked much distinct taste, the tangy cream cheese frosting definitely made up for it. As for the apple spice, while getting bonus points for the tasty candied walnuts on top , it seemed as if a single spice overwhelmed the rest (ginger, maybe?). I was really prepared to love the s'mores but unless you get a bite with the tiny sprinkling of graham on top, it might otherwise be difficult to tell what kind of cupcake this was. However, this one earns back points for the most moist cake of the group, as well as the surprise marshmallow filling. Having read my previous posts I know you'll say I'm biased, but the pumpkin spice cupcake was my favorite of the group. The cake was soft and spongy, the combination of spices was well-balanced and the cream cheese frosting was the perfect combo. To top it all off, the cake is crowned with a small piece of pepita brittle, which was delicious even on its own.
Overall, I think More's definitely merits a visit after a long day of shopping, particularly for one of the most extensive and unique rotating daily menus I've seen. Cupcakes will set you back $3.50 each or $9.50 for a "flight" of 6 minis.
If you go
More1 E. Delaware Place
Chicago, IL 60611Tues-Fri 8am-8pm
Saturday 9am-8pmSunday 10am-6pm
Tuesday, October 13, 2009
Liberty and Pumpkin Mousse For All!
America has hit a new low. This year, many Americans will not be able to receive the basic products that they have come to rely upon year after year. Services they have come to take for granted will be in short supply. This Thanksgiving, many children may go without. No, I'm not talking about health care. I'm talking about the Great American Canned Pumpkin Shortage of 2009.
When I first heard rumors of a shortage, I scoffed. "Ha!" I said. It seemed inconceivable that something as traditionally American as pumpkin pie might be hard to come by at Thanksgiving. But I'm not laughing now. Week after week I've gone to several local supermarkets only to come face to face with an empty shelf where the canned pumpkin pie filling should be (to the right of the fruit pie fillings, and just underneath the instant pudding). It seems that, due to bad weather, many of last year's pumpkins were deemed "unacceptable" and now we're feeling the pinch. To make matters worse, the Libby company has placed supermarkets on a quota system in an attempt share the wealth. Clearly, it is not working. While my mother assures me that there is still plenty of pumpkin to be had at her regular grocery store in Ohio, my recommendation to you would be to BUY! BUY NOW!! if you happen to come across any cans and think you'll need them later in the season.
Pumpkin Mousse in Cinnamon Pastry Shells
Cinnamon sugar
(1 Tbs sugar, 1/2 tsp ground cinnamon)
1 can (30 oz) pumpkin pie filling (not plain)
1 box (3.4 oz) vanilla instant pudding and pie mix
2 tsp ground cinnamon
1 cup whipped topping, thawed
1. Preheat oven to 400 degrees.
2. Place pastry shells on a baking sheet. Brush tops with butter and sprinkle with cinnamon sugar. Bake according to package directions. Cool to room temperature. Remove tops and reserve for garnish. Remove soft pastry inside shells and discard.
3. Beat pumpkin pie mix, pudding mix and cinnamon in large mixing bowl on medium speed for 2 minutes. Gently fold in whipped topping. Spoon or pipe about 1/3 cup pumpkin mousse into each pastry shell. Top with pastry tops, dust with cinnamon or drizzle with caramel if desired. Serve immediately.
Pumpkin Pie Filling Mix For each 30-oz can of pumpkin add:
2 cups granulated sugar or light brown sugar
2 tsp ground cinnamon 1/2 tsp ground nutmeg
1/2 tsp ground cloves
1/2 tsp ground ginger Stir thoroughly to combine and freeze in 1 cup portions. Makes 4 1-cup servings or enough for 1 pie.
When I first heard rumors of a shortage, I scoffed. "Ha!" I said. It seemed inconceivable that something as traditionally American as pumpkin pie might be hard to come by at Thanksgiving. But I'm not laughing now. Week after week I've gone to several local supermarkets only to come face to face with an empty shelf where the canned pumpkin pie filling should be (to the right of the fruit pie fillings, and just underneath the instant pudding). It seems that, due to bad weather, many of last year's pumpkins were deemed "unacceptable" and now we're feeling the pinch. To make matters worse, the Libby company has placed supermarkets on a quota system in an attempt share the wealth. Clearly, it is not working. While my mother assures me that there is still plenty of pumpkin to be had at her regular grocery store in Ohio, my recommendation to you would be to BUY! BUY NOW!! if you happen to come across any cans and think you'll need them later in the season.
While Libby is assuring customers that more cans are coming, in the meantime I'm hedging my bets. It seems that cans of plain pumpkin are a little easier to come by so, of course, I bought the last two 30-oz cans I could find. By adding sugar and spices to the plain pumpkin, you can essentially make your own pumpkin pie filling. I plan to freeze this in small batches to use for future recipes and hopefully stretch my supply until the pumpkin drought is over. For the pumpkin mousse below, I've included the recipe as-written to include pre-mixed pie filling, but I'll also include my recipe for adding your own sugar and spice below in case you're unfortunately in the same pumpkin-less boat as me. Of course, if you're feeling adventurous, you can always bake your own pumpkin, scoop out the flesh, process in a blender and substitute for canned. Let me know how that goes :)
Pumpkin Mousse in Cinnamon Pastry Shells
2 boxes (10 oz each) frozen puff pastry shells
3 Tbs melted butterCinnamon sugar
(1 Tbs sugar, 1/2 tsp ground cinnamon)
1 can (30 oz) pumpkin pie filling (not plain)
1 box (3.4 oz) vanilla instant pudding and pie mix
2 tsp ground cinnamon
1 cup whipped topping, thawed
1. Preheat oven to 400 degrees.
2. Place pastry shells on a baking sheet. Brush tops with butter and sprinkle with cinnamon sugar. Bake according to package directions. Cool to room temperature. Remove tops and reserve for garnish. Remove soft pastry inside shells and discard.
3. Beat pumpkin pie mix, pudding mix and cinnamon in large mixing bowl on medium speed for 2 minutes. Gently fold in whipped topping. Spoon or pipe about 1/3 cup pumpkin mousse into each pastry shell. Top with pastry tops, dust with cinnamon or drizzle with caramel if desired. Serve immediately.
Pumpkin Pie Filling Mix For each 30-oz can of pumpkin add:
2 cups granulated sugar or light brown sugar
2 tsp ground cinnamon 1/2 tsp ground nutmeg
1/2 tsp ground cloves
1/2 tsp ground ginger Stir thoroughly to combine and freeze in 1 cup portions. Makes 4 1-cup servings or enough for 1 pie.
Thursday, October 8, 2009
Wreckless
Everybody has one. That one haunting cake from their past that didn't turn out quite as expected. After the excitement of picking out their favorite Disney-themed birthday cake or describing in detail their dream wedding cake, happily driving to the bakery the morning of the big event, slowly opening the smooth, white bakery box in anticipation only to discover....
Fortunately, this is pretty tame compared to most of the unintentionally hilarious cake photos submitted by readers to Jen Yates' blog "Cake Wrecks: When Professional Cakes Go Horribly, Hilariously Wrong." An online gallery devoted entirely to "deformed, distasteful and bizarrely decorated wedding and birthday cakes," Cake Wrecks features reader submissions in several categories like Creative Grammar, Literal LOLs and Mithspellings. If you haven't been to Jen's blog yet you Must. Go. Now. This is honestly the funniest blog I've found on the web though, I must warn you, it may not be office appropriate. Not because of the content, but rather because it may cause you to snort uncontrollably while you try to hold in your laughter in an office environment. Of course, your office may be an uncontrollable snort-friendly kind of place, in which case, have at it. Just to give you a small taste, here are a few of my all-time faves:
Gross. The sign just makes it so much worse.
That's what you get for being specific:
Um, what?
First, the wedding cake inspiration:
Anyways, all of this is to say that now Jen has released a brand new Cake Wrecks book cataloging some of the great wrecks from the site as well dozens of never-before-seen masterpieces, so now you can guffaw freely at home pouring over its pages instead of trying to chortle quietly to yourself in the office. The book has the great pics and hilarious captions we've come to love from the site and this would make a great gift for anyone you know that's a fan of baking, decorating, or laughing at the misfortune of others. If you get a chance also be sure to check out Jen on her world tour where you may also find recreations of some of the best-loved wrecks from the blog.
This.
This is my family's "Cake Wreck." A cake that will live in infamy. Possibly for as long as this Barbie seems to have laid in a tanning bed. Yes, in fact the peroxide blonde Medusa-haired, tanorexic mess on the cake is actually supposed to be the Barbie depicted on the party plates you can see underneath excited, 6-year-old me.
Gross. The sign just makes it so much worse.
That's what you get for being specific:
Um, what?
First, the wedding cake inspiration:
Anyways, all of this is to say that now Jen has released a brand new Cake Wrecks book cataloging some of the great wrecks from the site as well dozens of never-before-seen masterpieces, so now you can guffaw freely at home pouring over its pages instead of trying to chortle quietly to yourself in the office. The book has the great pics and hilarious captions we've come to love from the site and this would make a great gift for anyone you know that's a fan of baking, decorating, or laughing at the misfortune of others. If you get a chance also be sure to check out Jen on her world tour where you may also find recreations of some of the best-loved wrecks from the blog.
Sunday, October 4, 2009
Snickerdoodle Dandy
So I've decided to ease into my "spicy" fall recipe extravaganza slowly by starting with a recipe that highlights just a single spice: cinnamon. I was instantly intrigued when I came across this recipe for Snickerdoodle Pie from Better Home & Gardens because it seems simple and homey yet comforting in the way that fall food always is. And, I mean, who doesn't love Snickerdoodles?
Even though it's assembled like a pie, this dessert puffs up just like its cookie namesake.
I also decided to pair this pie with a jarred caramel sauce and a quick cinnamon whipped cream. I'm totally pushing the cinnamon whipped cream this fall because it pairs with everything and is possibly the easiest way ever to impress your friends :) Also a note, the cinnamon syrup that tops this pie is delicious on its own and you may want to make up a couple of extra batches just to put on apple pie or vanilla ice cream or just about anything else you have in the house. It's that good.
Oh, and on a personal note...This is my 50th blog post! Hurray for me and a HUGE thanks to all of my readers out there!
Snickerdoodle Pie
1 recipe of your favorite pie crust
or 1 rolled, refrigerated unbaked pie crust
1 Tbs sugar
1/2 plus 1/4 tsp cinnamon, divided
2 tsp butter, melted
1/2 cup packed brown sugar
1/4 cup butter
3 Tbs water
2 Tbs light corn syrup
1/2 plus 1 tsp vanilla, divided
1/4 cup butter, softened
1/2 cup sugar
1/4 cup powdered sugar
1 tsp baking powder
1/4 tsp cream of tartar
1/2 tsp salt
1 egg
1/2 cup milk
1 1/4 cups all-purpose flour
1. Preheat oven to 350 degrees. Prepare pie crust and line 9-in pie plate. In a bowl combine 1 Tbs. sugar and 1/2 tsp cinnamon. Brush melted butter over pie crust and sprinkle with 1 tsp of cinnamon sugar mix, set aside. (Reserve remaining cinnamon sugar).
2. For syrup, in a small saucepan combine brown sugar, 1/4 cup butter, water, corn syrup and 1/4 tsp cinnamon. Heat to boiling over medium heat, stirring to dissolve sugar. Boil gently for 2 minutes. Remove from heat, stir in 1/2 tsp vanilla and set aside.
3. In a mixing bowl, beat 1/4 cup softened butter with an electric mixer for 30 seconds. Beat in sugar, powdered sugar, baking powder, salt and cream of tartar until well combined. Beat in egg and 1 tsp vanilla. Gradually beat in the milk until combined. Beat in flour. Spread evenly in crust-lined plate.
4. Slowly pour syrup over the filling in the pie plate, sprinkle with remaining cinnamon sugar. Cover edges of the pie with foil and bake 25 minutes. Remove foil and bake about 20 minutes more or until top is puffed and golden brown. Cool 30 minutes on a wire rack and serve warm.
Cinnamon Whipped Cream
8 oz whipping cream
1/8 cup powdered sugar
1 tsp vanilla
1/4-1/2 tsp cinnamon depending on taste
1. Using an electric mixer, beat cream at medium speed until fluffy and thick, about 2 minutes.
2. Add remaining ingredients to taste and mix until combined.
That's it!! I told you it was easy.
Sunday, September 27, 2009
Country Pumpkin
I absolutely love fall. Let me rephrase that. I absolutely love fall while it is still sunny and above 60 degrees outside. One of the best things about my recent travels was getting to enjoy my sightseeing while still graced with the lovely sunshine and warm temps of a lingering summer across the Continent. But no sooner had I touched down back at Dulles airport and emerged bleary-eyed from the baggage claim was I greeted with the undeniable proof that fall had arrived during my absence; the Starbucks Pumpkin Spice Latte had returned.
I have a sneaking suspicion that the true reason I love fall is that, in fact, I love all things "spice." Pumpkin spice. Apple spice. Gingerbread spice. You name it, I can't wait for the excuse of cooler temps to tuck into a warm bowl of anything-spice-with-caramel-on-top. I don't know why there are certain flavors that we come to associate with specific seasons of the year, but I also don't ask too many questions before stocking up on jars of cinnamon, nutmeg, cloves and allspice that herald the return of the holiday season.
Thus, I apologize in advance for what is sure to be an inundation of pumpkin spice recipes over the next three months, as I've already come across several pumpkin-themed custards, bread puddings, cheesecakes and candies that I can't wait to try. If you get spiced out, just check back with me in the New Year when I'm sure to have returned to my senses :) And, to kick it all off, I bring you Pumpkin Chocolate Brownies! The title of this recipe is a little misleading, as the "brownies" are really more of a cake or quick bread texture in the shape of brownies, but they are delicious nonetheless. Also a note, these will turn out just as well if you accidentally buy a can of pumpkin pie mix (which already includes some spices) instead of plain pumpkin. I mean, not like I would ever do anything like that but...uhh...you know, just in case you were wondering.... (Whoops!)
Pumpkin Chocolate Brownies
makes 16
1/2 canned pure pumpkin
1/3 cup brown sugar
1 egg
2 egg whites
2 Tbs vegetable oil
1 cup all-purpose flour
1 tsp baking powder
1 tsp cocoa powder
1/2 tsp ground cinnamon
1/2 tsp ground allspice
1/4 tsp salt
1/4 tsp ground nutmeg
1/3 cup mini chocolate chips
1. Preheat oven to 350° F. Spray 8- or 9-inch-square baking pan with nonstick cooking spray.
2. Combine pumpkin, sugar, egg, egg whites and oil in large mixer bowl. Beat with an electric mixer on medium speed until blended. Add flour, baking powder, cocoa, cinnamon, allspice, salt and nutmeg. Beat on low speed until batter is smooth. Stir in chocolate chips. Spread evenly into prepared pan.
3. Bake for 25 to 30 minutes or until wooden pick inserted near center comes out clean. Cool in pan on wire rack. Cut into 2-inch squares.
*I also doubled this recipe and baked in two pans
Sunday, September 20, 2009
Le Cupcake
I have a complex about fitting in when I travel. Fortunately, not to the point that you'll find me sporting these pants currently fashionable in Europe for some ungodly reason. But I have been known to get horribly, horribly lost before I will sink to pulling out a map and labeling myself as a tourist. On my recent trip to NYC I even made a big deal of slinking surreptitiously behind the statue of Atlas under the guise of art admiration only for the chance to peek at my map where no one could see. This may stem from from my experience living in Washington, DC and having seen groups of tourists that will stop in the middle of the sidewalk or actual road during rush hour just to snap a photo, interrupt locals mid-conversation to ask directions to the nearest McDonald's, and even hold the doors of a Metro train to keep it from leaving just so that Grandma and Tater Tot can make it down the escalator. When I travel, I'm there to experience the city, not to inhibit its inhabitants from going about their daily lives.
That being said, when I'm in a place for any length of time, I do begin to long for the comforts of home just like anyone else. Whether it's ordering Cokes at the local cafe, reading The Economist in the park or catching the non-dubbed English version of a movie from back home, it's these little perks that can make travel a little less lonely. So, not surprisingly, on my recent trip abroad I set out to see just how global the cupcake phenomenon has become. And, believe it or not Parisians, the cupcake has landed. With help from the global cupcakery listing at Cupcakes Take The Cake, I selected two shops in Paris that I just had to try.
The second shop I visited was Cupcakes & Co in the 11th arrondissement. Although Cupcakes & Co claims to be open everyday except Mondays at 10:00am, I made the mistake of showing up on a Sunday when they didn't open until 11:30 because, well, it's France on a Sunday and who was I to think they'd open on time? Sheesh. Anyways, the shopkeeper was incredibly nice and even entertained my questions in pathetic French after politely asking me to repeat myself several times. I chose a caramel cupcake that came with a dollop of salted caramel on top as well as a cupcake that needs no translation, Red Velvet. Unfortunately, the caramel cake suffered from the same dryness as Berko's cakes but the buttercream was delicious. The Red Velvet cake was softer and the flavor of the cream cheese frosting was spot-on, though I wish it hadn't been served cold. The cupcakes here were a little pricier, at €3.40.
One difference I noticed right away with the French cupcakeries is that they don't have placards denoting the flavor choices. Some will have a menu on the wall but you may be out of luck when it comes to flavor descriptions if your French vocabulary doesn't include words like "peanut butter" or "chocolate with lavender ganache." Fortunately, "cupcake," "carrot cake," and "red velvet" are the same in any language.
If you go
Berko
23 Rue Rambuteau
Paris, 75004
Metro: Rambuteau
Tues-Sun 11:30-8pm (7:30pm on Sundays)
Cupcakes & Co
25 Rue de la Forge Royale
Paris, 75011
Metro: Faidherbe-Chaligny
Tues-Sun 10am-7pm
That being said, when I'm in a place for any length of time, I do begin to long for the comforts of home just like anyone else. Whether it's ordering Cokes at the local cafe, reading The Economist in the park or catching the non-dubbed English version of a movie from back home, it's these little perks that can make travel a little less lonely. So, not surprisingly, on my recent trip abroad I set out to see just how global the cupcake phenomenon has become. And, believe it or not Parisians, the cupcake has landed. With help from the global cupcakery listing at Cupcakes Take The Cake, I selected two shops in Paris that I just had to try.
The first was Berko in the Marais, amazingly only a couple of blocks from where I was staying (fate!) In addition to cupcakes, Berko also offers a few other pastries as well as salads, I guess in case you want to round off your meal with a little something healthy instead of just straight sugar :) You can eat sur place but there are only a couple of stools at the counter, so you may be better off to take your cakes to go in their cute little box and find a sunny spot in the park. I mean, hey, you're in Paris after all. I tried to choose flavor combos that I hadn't had in the U.S. and went with a lemon meringue and a white chocolate raspberry. The lemon meringue had a layer of lemon curd inside and was topped with a crunchy layer of toasted meringue (almost too crunchy, it was a little hard to eat). The second cupcake was a white cake filled with fresh raspberries and topped with white chocolate ganache--it was delish. Unfortunately, both of the cakes were much drier than the American style of cake, but the tasty fillings more than made up for it. If you're not in the mood for cupcakes, Berko also offers several flavors of cheesecake that will make you feel right at home. At Berko a cupcake will run about €2.80.
The second shop I visited was Cupcakes & Co in the 11th arrondissement. Although Cupcakes & Co claims to be open everyday except Mondays at 10:00am, I made the mistake of showing up on a Sunday when they didn't open until 11:30 because, well, it's France on a Sunday and who was I to think they'd open on time? Sheesh. Anyways, the shopkeeper was incredibly nice and even entertained my questions in pathetic French after politely asking me to repeat myself several times. I chose a caramel cupcake that came with a dollop of salted caramel on top as well as a cupcake that needs no translation, Red Velvet. Unfortunately, the caramel cake suffered from the same dryness as Berko's cakes but the buttercream was delicious. The Red Velvet cake was softer and the flavor of the cream cheese frosting was spot-on, though I wish it hadn't been served cold. The cupcakes here were a little pricier, at €3.40.
One difference I noticed right away with the French cupcakeries is that they don't have placards denoting the flavor choices. Some will have a menu on the wall but you may be out of luck when it comes to flavor descriptions if your French vocabulary doesn't include words like "peanut butter" or "chocolate with lavender ganache." Fortunately, "cupcake," "carrot cake," and "red velvet" are the same in any language.
If you go
Berko
23 Rue Rambuteau
Paris, 75004
Metro: Rambuteau
Tues-Sun 11:30-8pm (7:30pm on Sundays)
Cupcakes & Co
25 Rue de la Forge Royale
Paris, 75011
Metro: Faidherbe-Chaligny
Tues-Sun 10am-7pm
Tuesday, September 15, 2009
Notorious
Does food actually taste better when it's famous? On my trip to Paris last week, it was clear that everyone wants to be recognized as a superlative in this world capital of cuisine; The Best Ice Cream in Paris, the Oldest Bakery in Paris, The Most Exotic Chocolate in Paris, The Most Flamboyant Cocktail Hour in Paris...you get the idea. But simply because a particular food, restaurant, or chef is cemented in popular imagination as "The Best," does that necessarily make it so? Times are tough, the dollar is worth about a handful of marbles and pocket lint, and unfortunately some of those Parisian Bests have price tags to match their reputations. Nothing is more disappointing than traveling around the world and shelling out for a special treat only to be disappointed when that Best Of isn't really so great after all. With this in mind, I set off to sample one of the supposed best and oldest bakeries in Paris: Poilâne.
While it might be somewhat of an American fantasy that Parisians spend their days crisscrossing the city to seek out the best market gems Paris has to offer, more often than not people stick to their local neighborhood shops for staples like bread, cheese and veggies. Thus, having to navigate two metro lines to reach Poilâne's Boulevard de Grenelle location and schlep my loaf back across town, I was really hoping this boulangerie would live up to the hype. Opened in 1932 by Norman baker Pierre Poilâne, the bakery is so famous in fact, not only is it recommended by Martha Stewart and Ina Garten of Barefoot Contessa fame, but you can actually order some of their loaves online for worldwide delivery to the tune of €8-€40, plus shipping, depending on the loaf. Even artist Salvador Dalí, having meet then proprietor Lionel Poilâne in 1969, began to order objects and sculptures made of bread, culminating in an entire room made of bread in 1971.
The Pain Siegle wheat boule I selected was dense but soft and slightly sweet, stayed fresh for the rest of my trip, and cost €3.80 (which converts to about 95 marbles and 3 handfuls of lint). Ultimately, while I wasn't disappointed with my Poilâne loaf, it's clear that at this shop you're paying for the experience. The nice shop ladies are dressed in cotton shifts and aprons reminiscent of a long-ago Paris, the loaves are flour dusted and decorative, and if you come by for your daily baguette or croissant you'll be out of luck; Poilâne doesn't sell either of these. Additionally, because of Poilâne's fame, you're just as likely to find loaves sold at some supermarkets or served at local cafes. While I'm glad that I got to visit this historic Parisian institution of baking, I also passed a no-name bakery on the same street that had a line out the door both on the way to and from Poilâne, thus confirming my belief in getting out to explore the nooks and crannies of a neighborhood when you travel. Just goes to show that sometimes the "bests" may actually be places you've never heard of at all.If you go
Poilâne
8 rue du Cherche-Midi
Paris 75006
Metro: St. Sulpice
Mon-Sat 7:15am-8:15pm
Poilâne
49 Blvd de Grenelle
Paris 75015
Metro: La Motte-Piquet Grenelle
Tues-Sun 7:15am-8:15pm
Tuesday, September 8, 2009
Waffling
One of my favorite parts about traveling is getting to sample regional food in its native territory. For example, even though most of us have probably had deep dish pizza or gyros, I'm sure the experience is altogether different for those who've had the opportunity to try them in Chicago or Greece (respectively). Similarly, when I embarked on a trip to Europe last week with my first stop in Brussels, many previous travelers assured me that there was no shortage of regional specialties in Belgium. Of course there are several well known mainstays that come to mind: beer, mussels, fries, chocolate...and Belgian waffles.
I'll admit that most of my previous experience with Belgian waffles includes contemplating the menu at Bob Evans, or IHOP or Denny's (I like breakfast, ok?) and wondering aloud, "What makes a Belgian waffle different than a regular waffle?" Usually, no one seems to have an answer and they busy themselves dumping hot sauce or ketchup or whatever else onto their eggs and pretend not to have heard my ridiculous Belgian waffle question for the 14th time. Oh well. But just this week not only was I able to visit a friend in Brussels, but was able to sample some of the local fare and discover, once and for all, what these Belgians have been up to with their waffle irons for the last several hundred years.
And, no, the difference isn't just that they're bigger than an Eggo.
In fact, it's more likely that the Eggo is just a poor approximation of a Belgian waffle (Dear Eggo, please do not sue me. Thanks, Hilary). If you're lucky enough to stop by one of the ubiquitous waffle stands in Brussels, you'll see right away that the real thing is square or rectangular instead of round, will be served wrapped in paper as a takeaway, and will be served with powdered sugar, whipped cream and/or chocolate rather than butter and syrup. Additionally, different regions of Belgium even have their own twist on the waffle and you're likely to find the most popular of these served alongside the typical Belgian waffle: the Liege waffle.
If you have a sweet tooth, the Liege waffle is for you. Whereas the regular Belgian waffle is plain in flavor and softer in texture, the Liege waffle is made with sugar and thus develops the most amazing caramelized sugar coating on the outside when baked in the waffle iron (clearly you can tell which one I picked). If you're on the go, this is a great alternative to a regular Belgian waffle with heaps of sweet toppings that might be harder to eat while sightseeing through the picturesque, gilded pathways of downtown Brussels. So, next time I'm at IHOP I'll just take mine wrapped in paper to go and ask, "Which way to the Manneken Pis?"
Sunday, August 30, 2009
Dessert In The Raw
I like to eat. As such I don't really have much experience with any of the fad diets that have come and gone over the past few years. The Zone, Atkins, South Beach, Gwyneth Paltrow's veggie, bean, and well-chewed rice macrobiotic diet (I'm serious, look it up)...all of these pretty much just serve the purpose of depriving me from my favorite foods, usually desserts. But lately several new cookbooks have attempted to incorporate desserts into the New Age Diet fold and I'm not sure how I feel about it.
Specifically, I'm talking about the raw food diet. Arguably less of a diet than a lifestyle, "raw foodists" consume only uncooked, unprocessed, often all organic foods. While raw diet foods can be warmed to a temperature of less than 104 degrees, the idea is that all foods are served uncooked to preserve the highest possible level of naturally occurring nutrients and to keep digestive enzymes intact. Having read that last sentence, like me you're probably wondering how BAKED goods could possibly fall within the realm of options under a diet that does not allow food to be cooked. But two new books, Raw for Dessert by Jennifer Cornbleet and Ani's Raw Food Desserts by Ani Phyo, tell us that incorporating simple, healthy, delicious and raw desserts into our diet is simple! Cookies, brownies, even cheesecakes!
Uh huh.
I'm still skeptical.
While I'm all for retaining nutrients and think it's unfortunate that so much nutritional value can be lost in the cooking and preservation process, I'm just not convinced that vitamins and minerals are usually what we're concerned with while we're downing that brownie sundae. Additionally, what you gain in nutrition you may lose in value. In order to warm your "baked" goods into anything resembling a cookie, brownie, etc. you'll need a food dehydrator. Cost? Anywhere from $50-$200 depending on the level you select. Also, in order to substitute for items like milk and eggs, most raw dessert recipes call for uncommon and expensive ingredients like agave nectar, carob powder, or cacao butter. However, some of the raw dessert blogs I've come across in my research look downright delicious so I'm trying to keep an open mind on this one, but I'll probably just stick to sorbet next time I'm looking for a raw dessert.
Sunday, August 23, 2009
Bananarama
Just as summer tends to lead to an overabundance of certain garden fruits and vegetables (zucchini comes to mind...) bananas are also a summer fruit that I can almost never seem to get through before the bunch seems to speckle and soften almost overnight. Such was the case this weekend when I came home from a business trip to be greeted by the sickly-sweet smelling present of overripe bananas I'd inadvertently left on the counter in the mad dash to make it out of the house the week before. Yummy. My mom is almost religious about freezing overripe bananas, which is a great idea for not wasting food and also to have bananas on hand whenever you need them for dishes like banana bread or even smoothies. Eyeing up the brown bunch, naturally banana bread was my first thought but having just made more zucchini bread than one human needs to eat, I was hoping to skip the loaves and mix it up a little.
Flipping through the tome of Martha Stewart Cupcakes I'd received for my birthday, eagerly deciding which recipe I should pick to take the plunge into the 175 (Yes, 175) recipes, I happened to stumble across one for Roasted Banana Cupcakes with Honey-Cinnamon Frosting. Bingo! At first I thought "Roasted Banana" was simply the name of the recipe but, reading on, Martha does in fact call for you to actually roast the fruit. Don't worry, there are no spits or fire pits involved, simply placing unpeeled bananas into a 400 degree oven to enhance the flavors. Similarly to roasting almonds or hazelnuts (which, admittedly, I often skip in recipes) you'd be surprised how much a shot of heat really increases the taste.
Lately I'm also a really big fan of nontraditional frosting combinations, and I think that cinnamon-honey does a lot more for this cupcake than a typical vanilla or even cream cheese would. Because the cake recipe itself doesn't call for any spices, the cinnamon in the frosting makes it just slightly reminiscent of banana bread but in a modern way. Also because banana is a more neutral flavor, this would also be a good candidate for a filled cupcake (I just bought a Wilton #230 Bismarck Tip, stay tuned!) maybe with an apple cinnamon, or chocolate hazelnut filling, or something of that nature. I'm so glad I gave these cupcakes a whirl and I know they will definitely be on my recipe rotation from now on for whenever I have those pesky brown bananas hanging around.
Roasted Banana Cupcakes
makes 12-16
3 ripe bananas, plus 1-2 more for garnish
2 cups cake flour, sifted
1/2 tsp baking soda
1/2 tsp baking powder
3/4 tsp salt
1/2 cup (1 stick) unsalted butter, room temperature
3/4 cup sugar
3 large eggs, separated
1/2 cup sour cream
1 tsp vanilla extract
1. Preheat oven to 400 degrees. Line muffin tins with paper liners. Place 3 whole unpeeled bananas on a baking sheet and roast 15 minutes (the peels will darken). Meanwhile, sift together cake flour, baking soda, baking powder, and salt. Remove bananas from oven and let cool before peeling. Reduce oven temperature to 350 degrees.
2. With a mixer on med-high speed, cream butter and sugar until pale and fluffy. Add egg yolks, one at a time, beating until each is incorporated. Add roasted bananas, and beat to combine. Add flour mixture in three batches, alternating with two additions of sour cream, and beating until just combined after each. Beat in vanilla.
3. In another mixing bowl, with mixer on medium speed, whisk egg shites to soft peaks; fold one-third whites into batter to lighten. Gently fold in remaining whites in two batches.
4. Divide batter evenly among lined cups, filling each three-quarters full. Bake, rotating tins halfway through, until a tester in the center comes out clean, about 20 minutes. Allow to cool completely before frosting, thinly slice remaining bananas and place atop cupcakes just before serving, if desired. Cupcakes can be stored up to 3 days at room temperature, or frozen up to 2 months, in airtight containers.
Honey Cinnamon Frosting
2/12 cups powdered sugar
1 cup (2 sticks) unsalted butter, room temperature
2 Tbs honey
1/4 tsp ground cinnamon
With an electric mixer on medium speed, beat all ingredients until smooth. Use immediately, or refrigerate up to 5 days in an airtight container. Before using, bring to room temperature and beat until smooth.
Subscribe to:
Posts (Atom)